Machine Schedule – Overview
In the Customer Portal, click on the cog wheel in the toolbar, and select Shifts > Schedules.
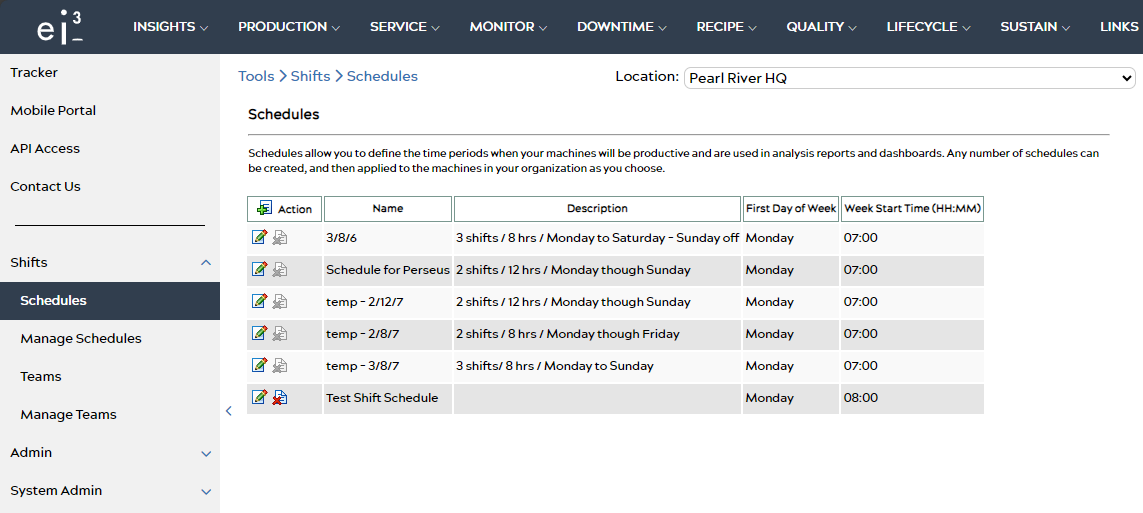
This page displays a list of all of the schedules that are currently available for your machines. From this list, it is also possible to change or delete a schedule.
New Schedule Creation
Clicking the New button in the Action header will allow you to create a new schedule.

The New Schedule page contains allows for the creation of a new schedule for your machines. You can choose a template from the Template selection bar or customize your schedule manually using the appropriate input fields.
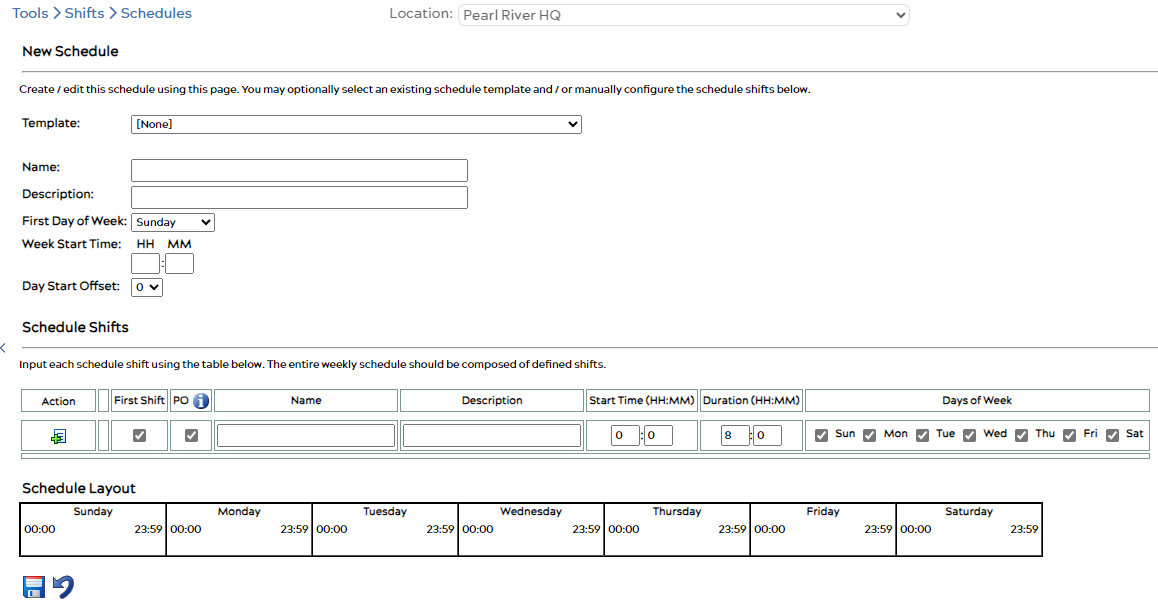
Enter a name and description for your schedule, and select a different first day of week, week start time or day start offset if desired. See What is a Day Start Offset and how can I use it? for more information.
Now, you must create Schedule Shifts for your new schedule.
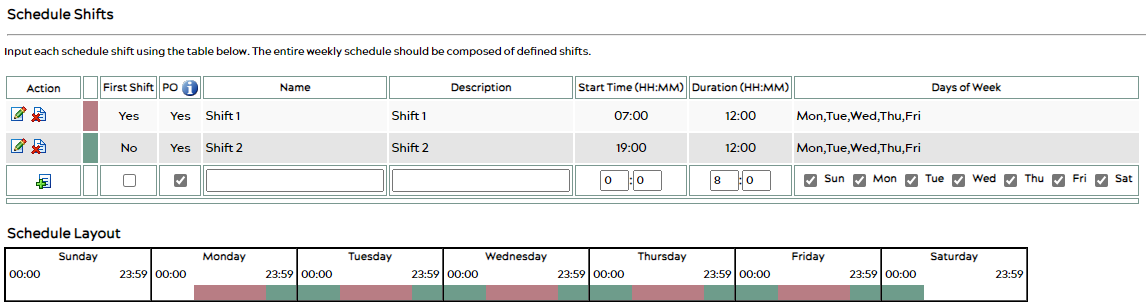
For each shift, enter a name and description, and select a start time and duration. Select the days of operation, and if applicable, modify the First Shift or PO check boxes.
PO stands for Plant Operation; if the PO box is unchecked, the corresponding shift will be considered to be “No Production”. The presence of No Production shifts will impact your machine’s Availability and OEE. For more information on using No Production in your machine schedule see Applying DOWNTIME to Shift Schedules.
It is important that the shift schedule is completely filled out. Gaps in a shift schedule will cause problems with OEE calculations and reports.
The Schedule Layout at the bottom of the page will visualize your schedule’s run times over the week period.
Once you’ve finished creating a schedule, it’s time to apply the schedule to your machine. See Manage Schedules for more information.
Changing & Editing Schedules
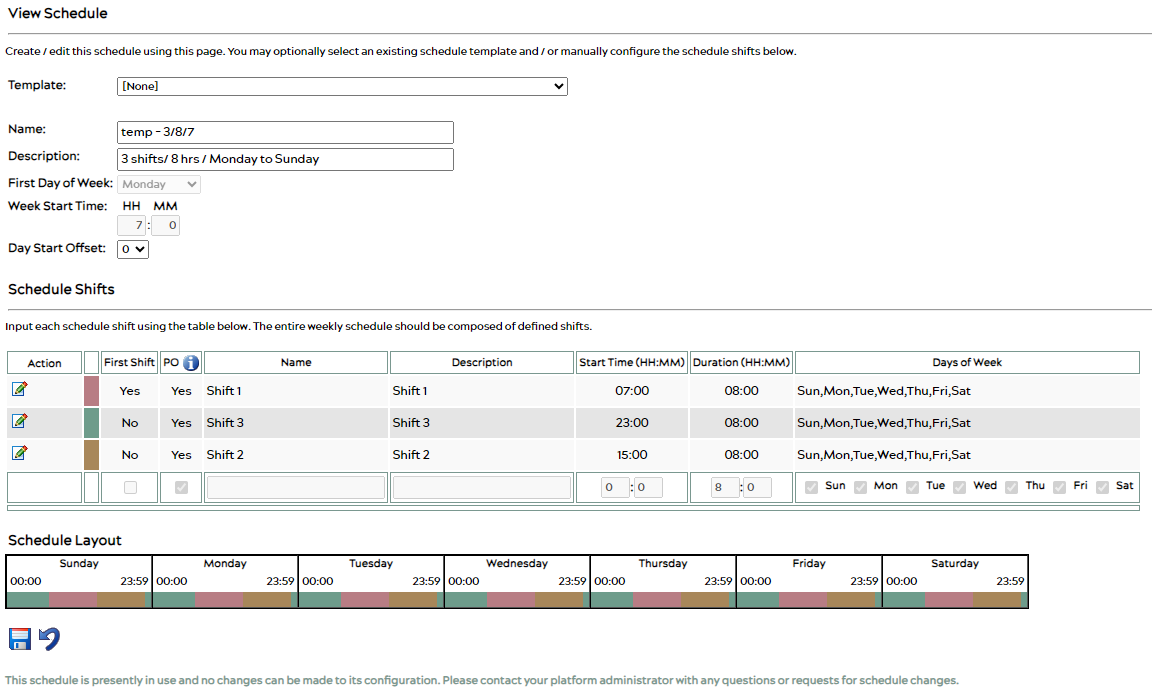
Clicking the ![]() icon next to a schedule on the list will bring up a page allowing you to view and edit an existing schedule.
icon next to a schedule on the list will bring up a page allowing you to view and edit an existing schedule.
Here it is again possible to choose a template for your schedule or to customize it to your needs using the input fields.
Please note that it is not possible to make modifications to a schedule that is being used by a machine in production.