The API method provides customers access to information such as machines that are connected to the network and productivity data of the machine. Once you have an API access key, a URL is created according to your provider.
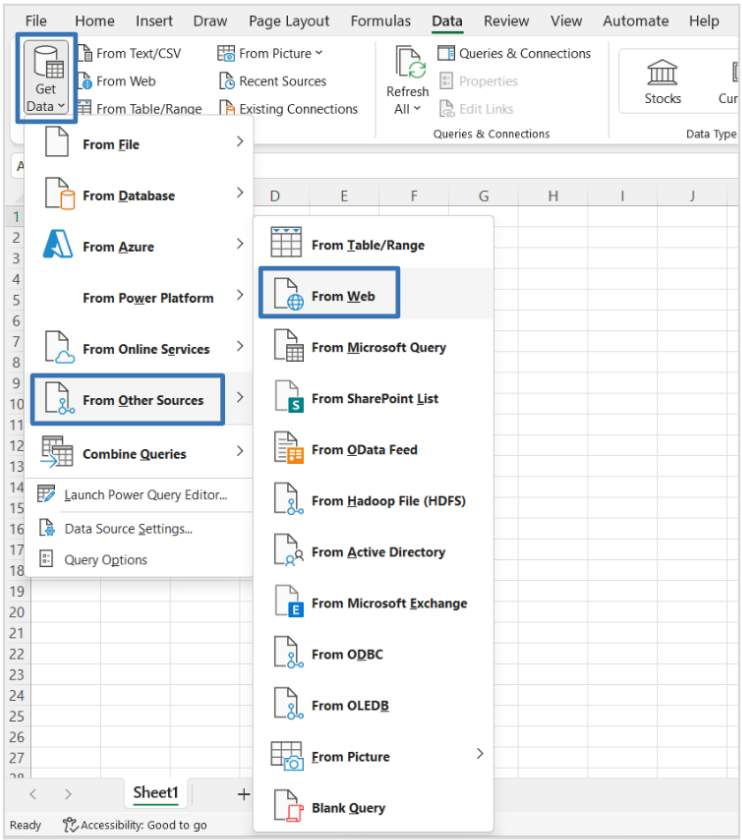
Importing Data into Excel:
1. Open Excel and open a new workbook.
2. Go to the Data Tab and click on Get Data. Select the option From Other Sources > From Web.
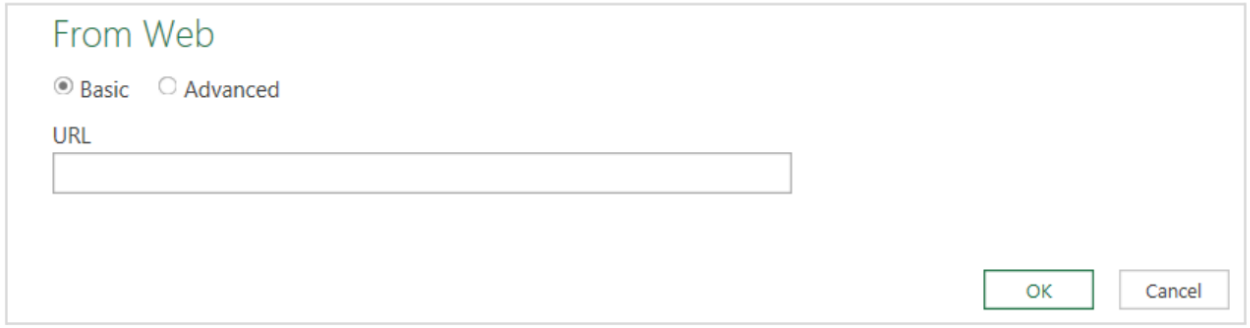
3. Paste the URL created based on your API key, and select OK.
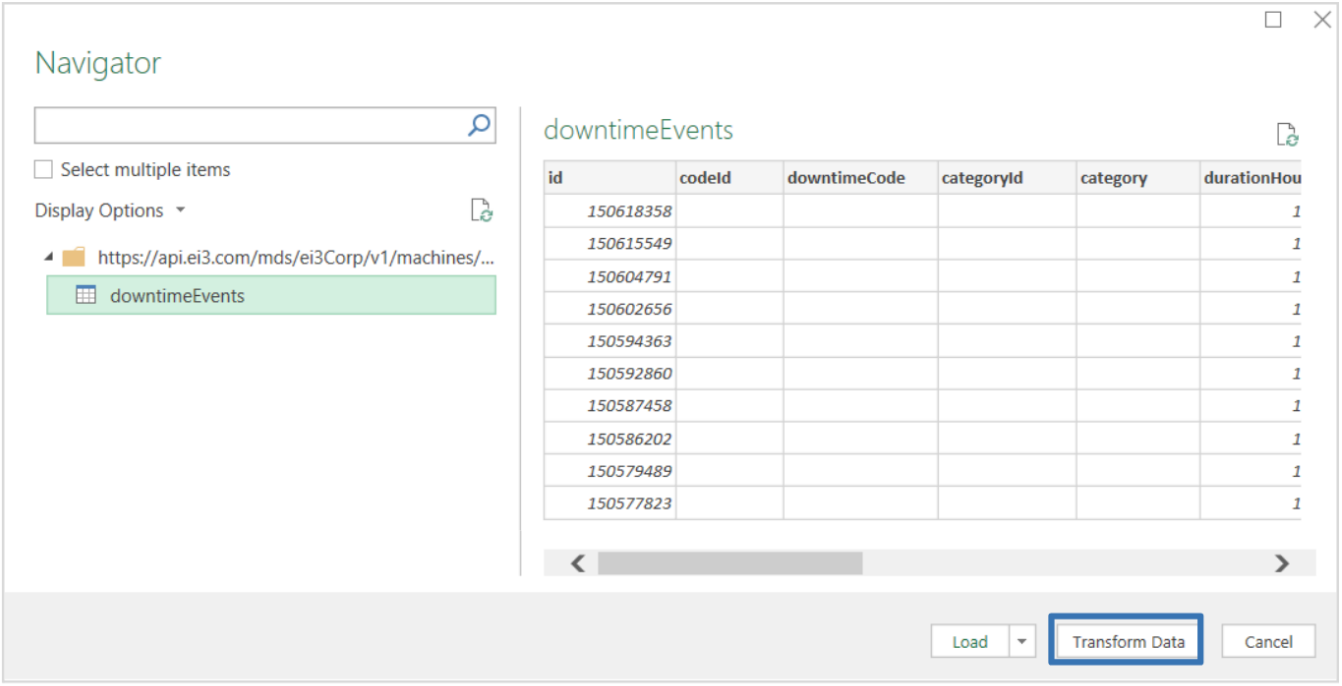
4. Select the appropriate data set to display and click on Transform Data.
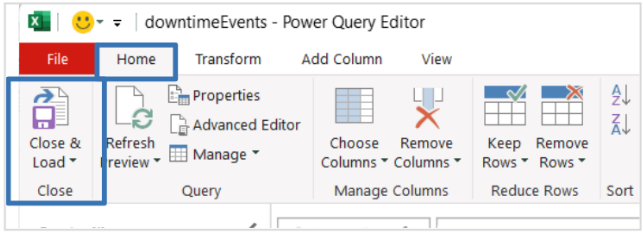
5. Now in the Power Query Editor, go to the Home Tab, on the top left select Close & Load
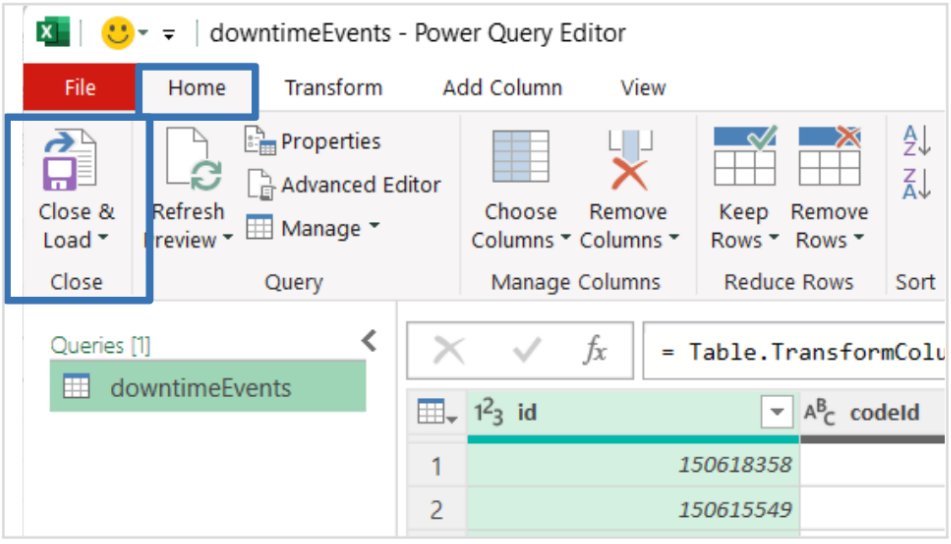
Your data has now been imported into Excel.
Note:
- If you want to access one data point, input the same URL except add the name of the data point. For example, using this URL from ei3 https://api.ei3.com/mds/ei3Corp/v1/machines/dataPoints/values?for=TotalMaterial&apiKey “for=TotalMaterial” was added so we can view the specific data from Total Material.
- Make sure that all of your API tag descriptions do not have any special characters i.e. “!,-,$,$,&”. Special characters are not supported, thus, an error message will pop up when trying to import these into Excel. If this is the case, your tag descriptions must be modified. If you do not have Admin rights, please contact care@ei3.com to modify tag descriptions.
Adding Columns to Table:
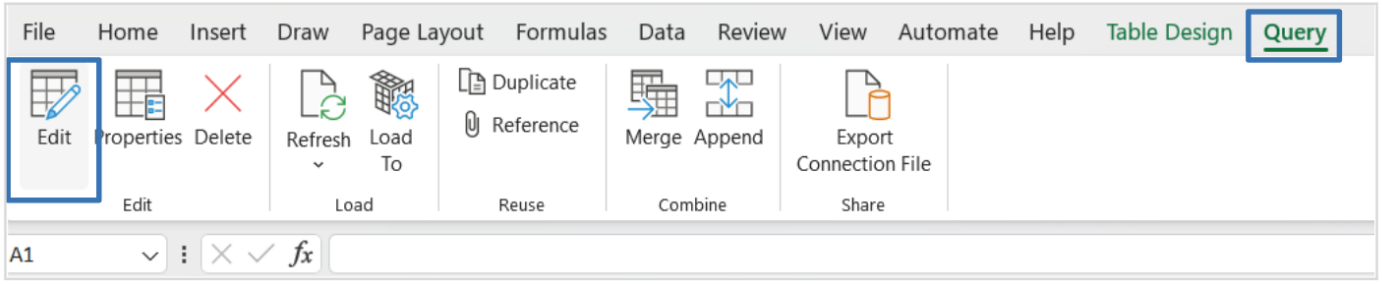
1. If you want to go back in to make changes to any columns or add data go to the Query Tab, and click Edit.
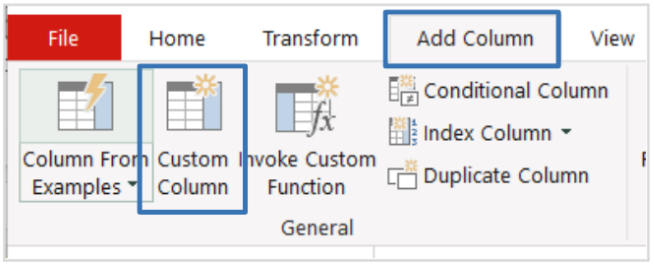
2. The Power Query window will open. Select Add Column Tab, then Custom Column.
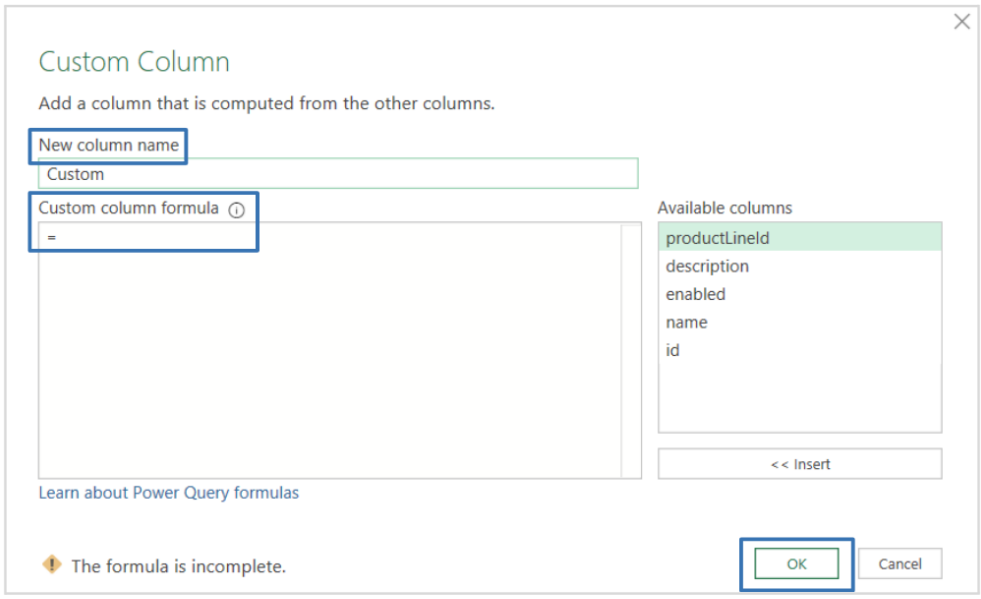
3. Add the new column name and input the columns formula for the new data, click OK.
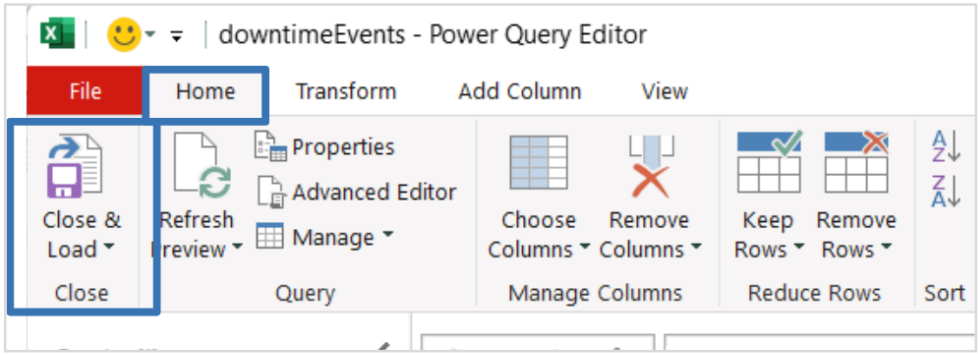
4. The new column should be added. Click the Home Tab, then Close & Load.
Refreshing Data:
Automatically Refresh Data:
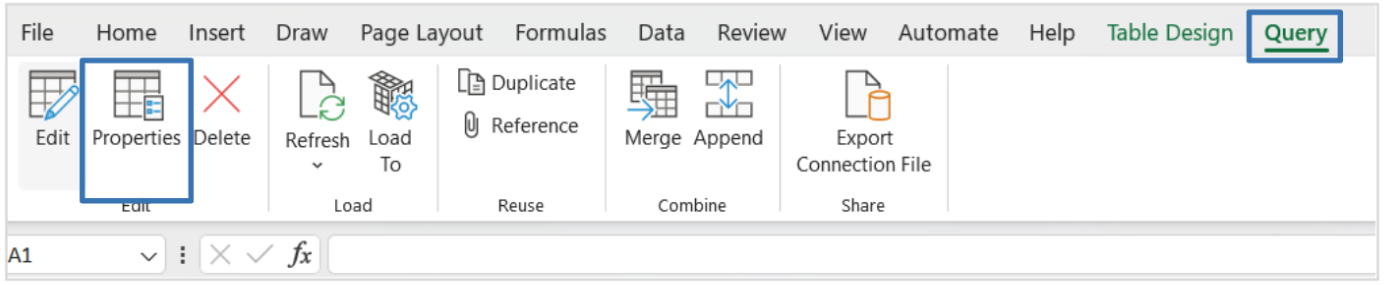
1. Click on the chart, go to the Query Tab, and select Properties.
2. A window will open titled “Query Properties”. Under usage, there are many different refresh options.
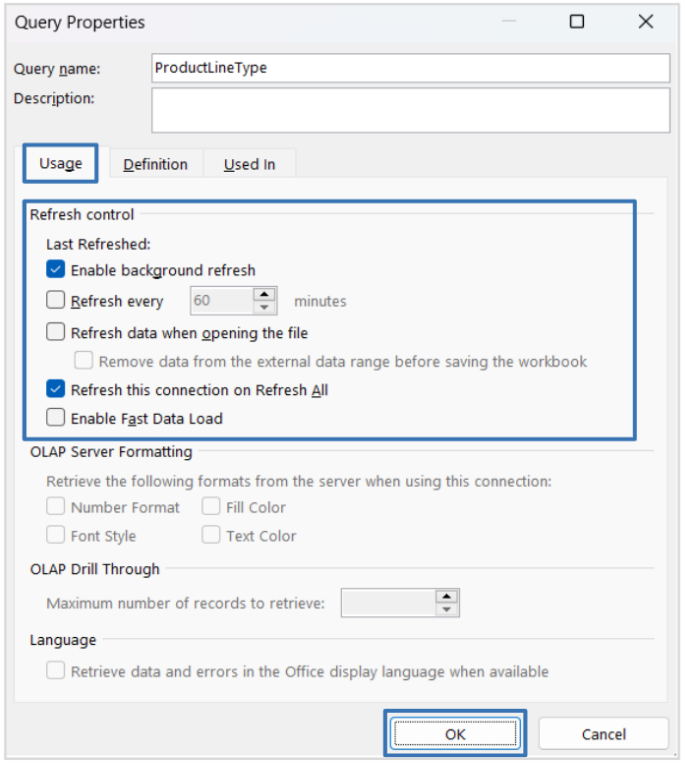
3. If you want your data to refresh every few minutes, check the box labeled Refresh every – minutes, then you can input the desired amount of time to refresh.
4. Click OK when you have selected your desired options. Your data will now refresh automatically.
Manually Refresh Data:
1. Select the Query Tab at the top of the page, then select the Refresh button.
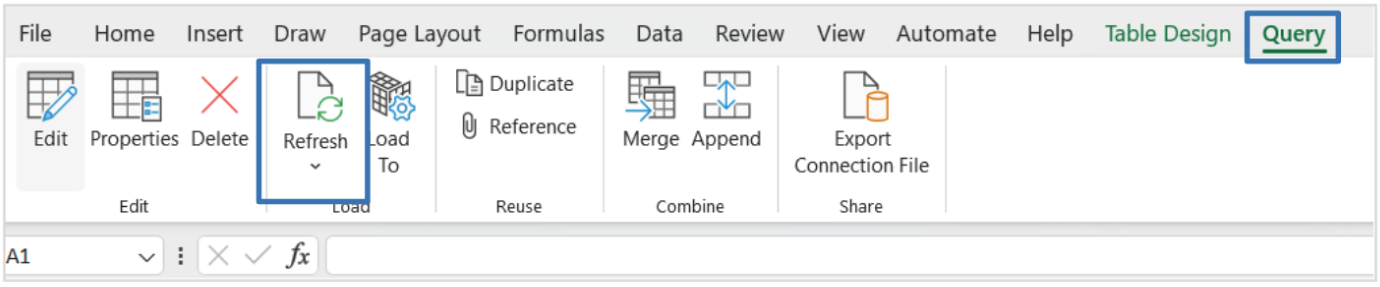
2. Your data will then be manually updated.
Graphing in Excel:
1. After the table has loaded, go to the Query Tab and select Edit.

2. The “Power Query Editor” will appear, stay on the Home tab.
3. Highlight the desired column, select Data Type, then drop-down options will appear. Select the option that pertains to your data.
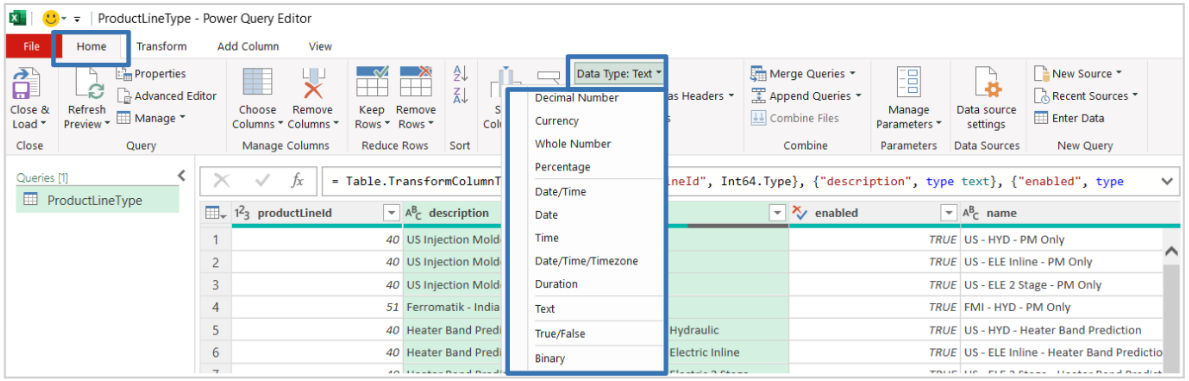
4. Repeat this with the next column. After editing each column, click Close & Load.
5. After your table has been refreshed, select the desired data to be graphed.
6. Go to the Insert tab and choose the appropriate graph. Some examples include line graphs, bar charts, and pie charts.

Note: If the data shows a date and time, select Data Type < Date/Time option. If there is a whole number being shown, you can select Whole Number or Decimal Number.
