Introduction
Use the Scrap Categories and Codes pages to configure scrap categories and codes for use by your plant or facility location. Scrap categories can be used to group scrap codes (e.g. all codes related to process issues could be grouped under a category called “Process Related Scrap”). In order to track your machine’s Scrap by assigning Scrap codes to material from certain Shifts and Jobs on the Entries page, Admins must first create Codes and Categories. Follow the steps in this article to also learn how to navigate the page and create Scrap Codes and Categories.
Prerequisites
Please note the following prerequisites in order to start your Scrap Tracking process:
- In order to access Scrap Tracking, users must have an active PRODUCTION subscription per machine participating in scrap tracking.
- Each machine must have an accurate Shift Schedule assigned to it.
- An Admin User for the location must first create scrap codes and categories before users can enter scrap data or assign scrap codes to bad material reported by the machine.
- Users can only create scrap codes and categories if they have Admin permissions.
Scrap Categories
Page Functions – Scrap Categories
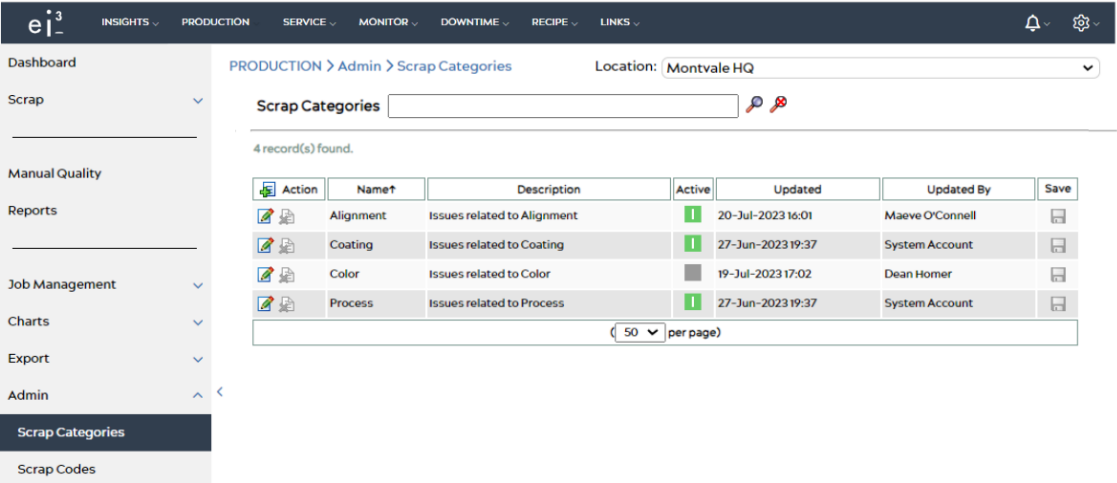
Scrap Categories are very general machine scrap terms. You can easily create and customize your own Scrap Categories from PRODUCTION > Admin > Scrap Categories.
![]()
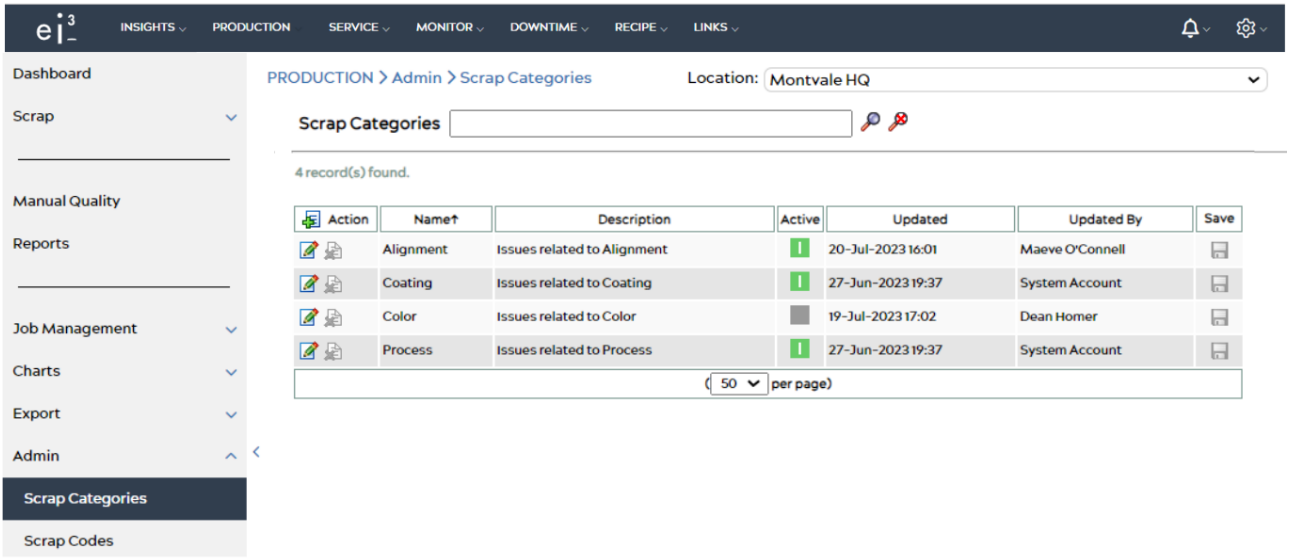
Scrap Categories are available for all machines at a location. If necessary, change locations using the Location bar at the top of the page to view a specific location’s Scrap Categories and Codes.
Search for a particular category using the search bar above the list of scrap categories. You can use the entire name, parts of the name, or other aspects of the category to find a list of possibilities. Use the asterisk, * , as a wildcard character to find all available categories for the location.
The search results will be displayed in a table. The column headings are as follows:
- Action: Click the
 to edit a category, or the
  icon to delete a category. The
  icon next to “Action” allows you to add a new category. See this article for more information on how to add a category.
 - Name: This is the name of the category. Note: Administrators should keep this name short, as it is used for plotting summary charts.
- Description: This is the description of the category. It is not required but can be helpful when grouping codes.
- Active: This check box signifies whether or not the category is active and can be used for codes. Once a category is used, it can be deactivated, but not deleted. This is to maintain consistency over time. Green indicated the category is active.
- Updated: This displays the date of the last update.
- Updated by: This displays who made the last update.
- Save: Click this save icon
 to save the information you have edited.
Once you’ve created your desired Scrap Categories, you can start creating and managing your machine Scrap Codes, and assign each to its specified category.
How To Create Scrap Categories
- In order to first create a Scrap Category, find PRODUCTION at the top of the screen, then select Admin > Scrap Categories.
- Next to the “Action” column, click the New icon
 to create a new category.
- Input the desired category Name and Description in the text boxes. Try to use names that are as short as possible, for quick reference and easier identification.
- Select
 from the Save column and wait for the page to reload.
Scrap Codes
Page Functions – Scrap Codes
![]()
- Action: Use the
 icon to edit a code, or the
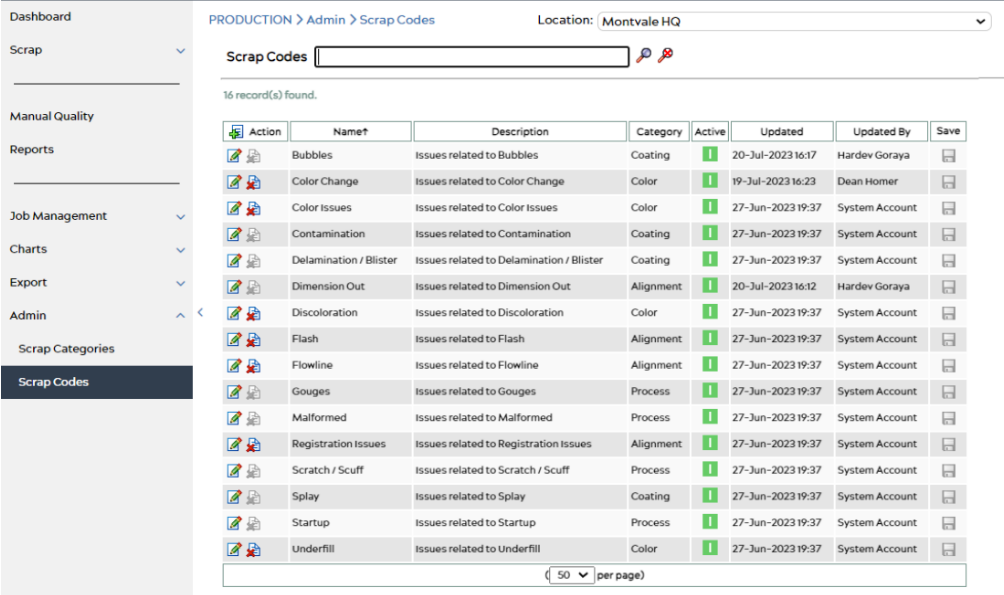
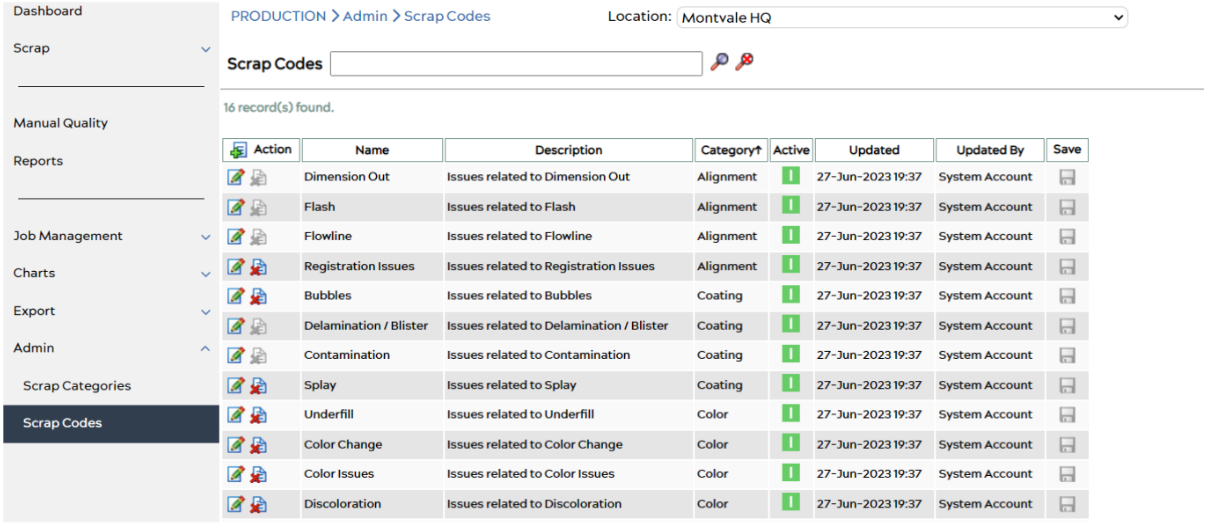
  icon to delete a code. The delete icon indicates whether or not the code is still used. Once a code is used, it cannot be deleted and the icon will not be selectable. This is to maintain consistency over time. The
  icon next to “Action” allows you to add a new category. See this article for more information on how to add a code:
 - Name: This is the name of the code. Note: Administrators should keep this name short, as it is used for plotting summary charts.
- Description: This is a description of the code.
-
- There is a maximum length to the code name (50 characters) and description (100 characters.
-
- Category: Categories of what each code pertains to.
- Active: This indicates whether or not the code is still used. Green indicates the code is active.
- Updated: This displays the date of the last update.
- Updated by: This displays who made the last update.
- Save: Click on the save icon
 in this column to save changes you have made to a code.
How To Create Scrap Codes
- In order to first create a Scrap Code, find PRODUCTION at the top of the screen, then select Admin > Scrap Codes.
- Next to the “Action” column, click the New icon
 to create a new code.
- Input the desired code Name and Description in the text boxes. Try to use names that are as short as possible, for quick reference and easier identification.
- Select the desired Category for the new code using the drop-down menu.
- Select
 from the Save column and wait for the page to reload.
