Note: LIFECYCLE can only be used on machines that have the LIFECYCLE product active.
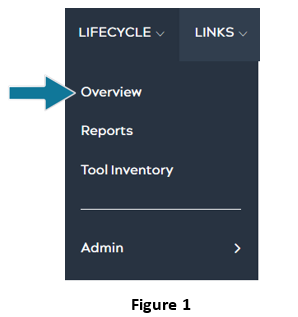
In the dashboard, first start up the LIFECYCLE app, then select Overview:
After selecting Overview, users will be brought to a page, like Figure 2 (referenced below), displaying sections for Parts and Assemblies, and Tools. Here, users are able to see a list of machines that have an active LIFECYCLE product under the Machine column. Users are also able to view the Maintenance Info and Lifecycle Info for each machine here. The Info column shows the number of parts and assemblies in each machine.
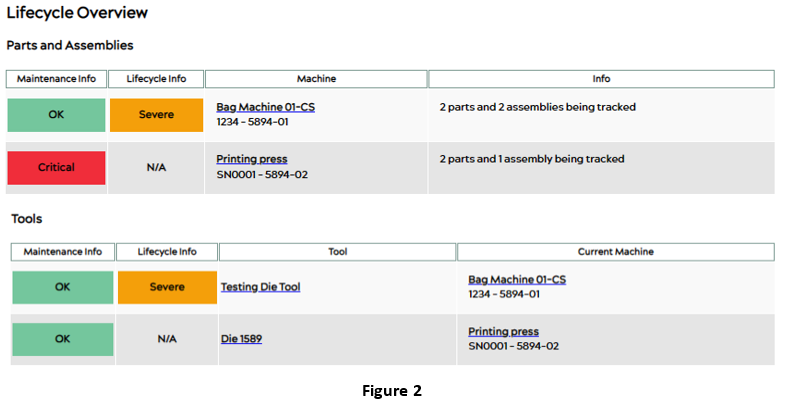
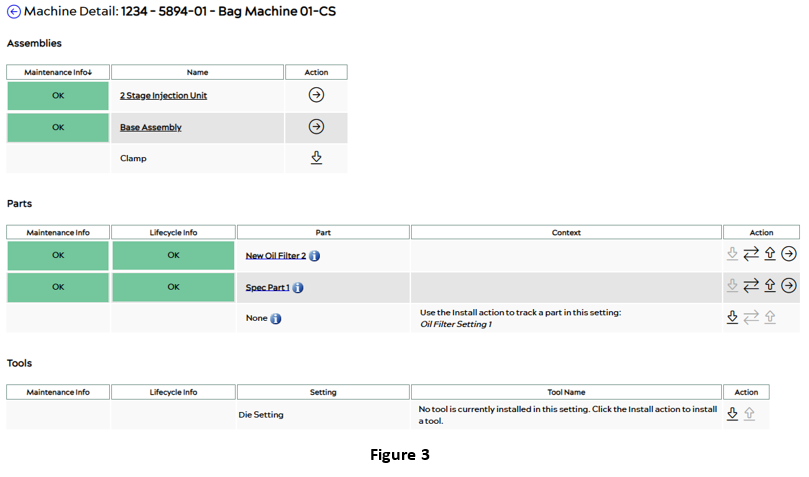
Select one of the machines under the Machine column in the Parts and Assemblies section. Clicking on a particular machine will drill down to the specific assemblies and parts of the machine bringing users to the Machine Details page, which will resemble Figure 3 below:
Assemblies
As seen in the previous Figure 3, the first section of the Machine Details page is labeled Parts (Figure 4 below). Assemblies are higher-level groupings of parts or systems in a machine that are used to organize Preventative Maintenance (PM) tasks. In the Assemblies section, users can view Maintenance Info, and assembly names, and can begin maintenance tracking.
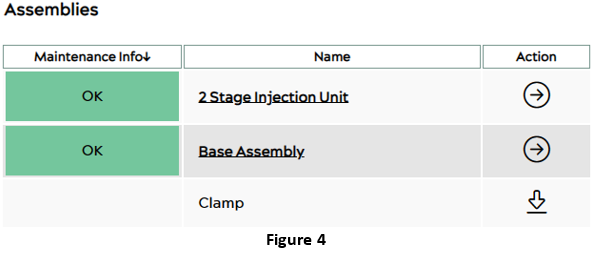
Under the column Name in Figure 4, clicking on any assembly’s name will take users to the Assembly Details page resembling the following:
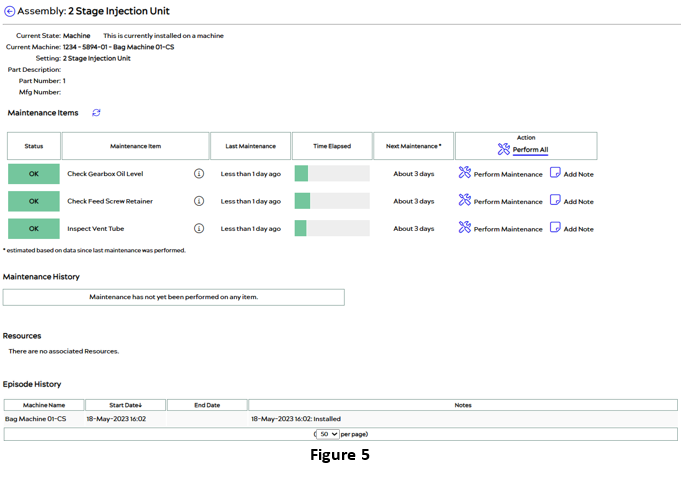
On the Assembly Details page, users can also view users can view the status of each maintenance item associated with the particular assembly as well as perform maintenance. The Maintenance History, Resources, and Episode History are also available for users to view in this section.
For a detailed description of how to update statuses and perform maintenance on an assembly, refer to this article: How to Update the Statuses in LIFECYCLE – Assemblies
For a detailed description of how to edit existing assemblies and add maintenance items, refer to this article: How to Edit Existing Assemblies and Add Maintenance Items – Lifecycle
Parts
As seen in the previous Figure 3, the second section of the Machine Details page is labeled Parts (Figure 6 below). Parts are the individual machine components. Each part can be set up with both Maintenance Items and Predictions. Each line of the Parts table shows the Maintenance Info, Lifecycle Info, Part names, and their context.

Under the column Part of Figure 6, click on any of the parts to view the details of the selected part in the Part Details as shown in Figure 7:
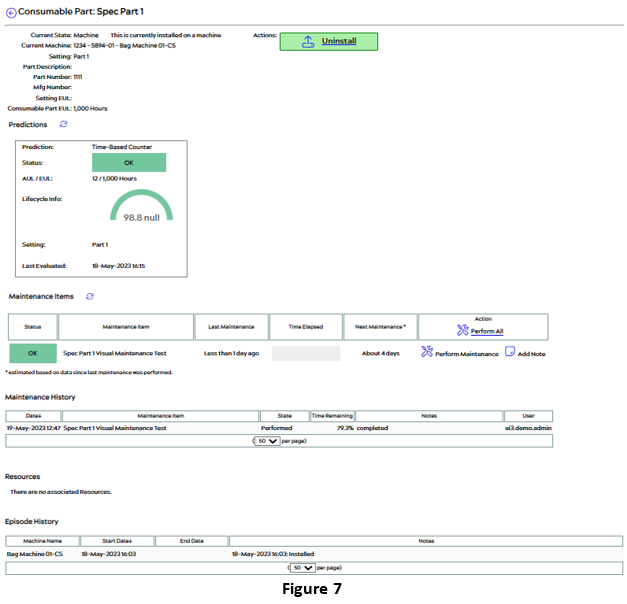
Under the Predictions section, the Status is OK as indicated by the green Lifecycle Info graphic. The prediction is a health score based on an algorithm that predicts the health life of a component. In this section, users can also see the AUL/EUL of the selected part.
On the Part Details page, users can also view Maintenance Items and perform maintenance on each part. The Maintenance History, Resources, and Episode History are also available for users to view in this section.
For a detailed description of how to update statuses and perform maintenance on a part, refer to this article: How to Update the Statuses in LIFECYCLE – Parts
For a detailed description of how to edit existing parts and add maintenance items, refer to this article: How to Edit Existing Parts and Add Maintenance Items – Lifecycle

