Note: LIFECYCLE can only be used on machines which have the LIFECYCLE product active.
For general information and definitions on parts and assemblies please see this article: LIFECYCLE – Parts and Assemblies.
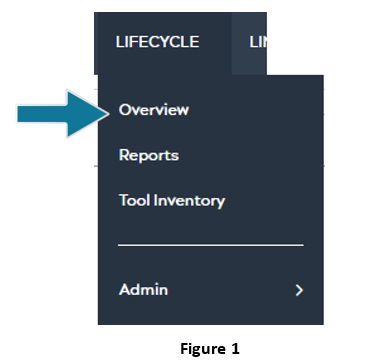
In the dashboard, first start up the LIFECYCLE app, then select Admin > Overview:
After selecting Overview, users will be brought to a page, like Figure 2 (referenced below), displaying sections for Parts and Assemblies, and Tools. The Info column shows the number of parts and assemblies in each machine.
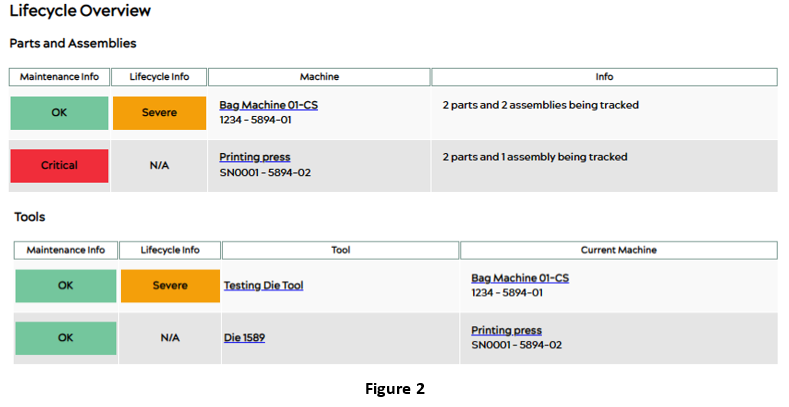
In Figure 2, there are two machines under the Machine column in the Parts and Assemblies section: Bag Machine 01-CS and Printing Press. Selecting a particular machine will bring users to a page like Figure 3 below:
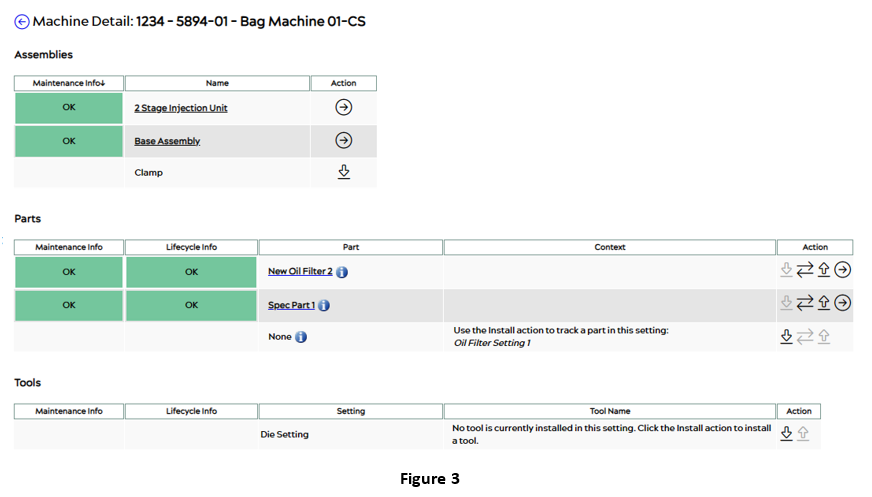
This page in Figure 3 is the Machine Details page, which displays the Assemblies, Parts, and Tools for the selected machine.
Parts
Figure 4 focuses solely on the Parts section of Figure 3:
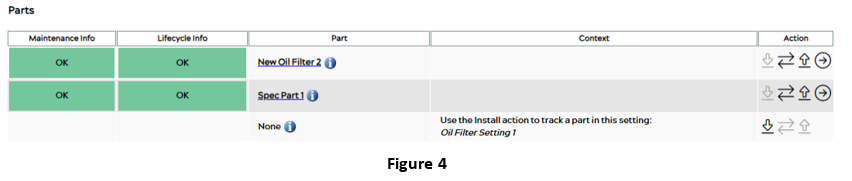
This selected machine has three parts, two of which have already been installed: New Oil Filter 2 and Spec Part 1. The first icon ![]() under the Action column is grayed out when a part has already been installed. As shown in the picture below, the part labeled None has not yet been installed, thus allowing the user to select the icon to install the part and track it.
under the Action column is grayed out when a part has already been installed. As shown in the picture below, the part labeled None has not yet been installed, thus allowing the user to select the icon to install the part and track it.
After selecting the ![]() icon in the None row, under the Action column, will bring the user to a new page as seen below in Figure 5:
icon in the None row, under the Action column, will bring the user to a new page as seen below in Figure 5:
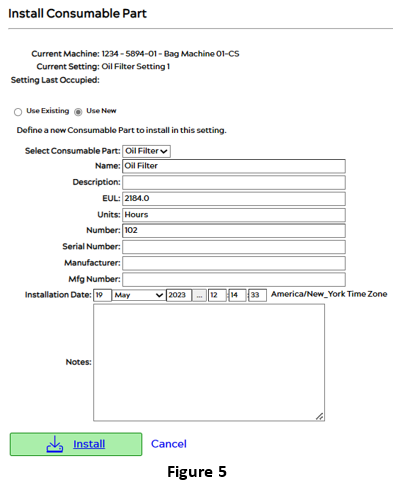
This is where users can install a part and will fill out the required information for the part, including the part name, the EUL value, and date of installation.
The replace icon ![]() in Figure 4 allows the user to replace the selected part with another part. Selecting this icon will show a page like Figure 6:
in Figure 4 allows the user to replace the selected part with another part. Selecting this icon will show a page like Figure 6:
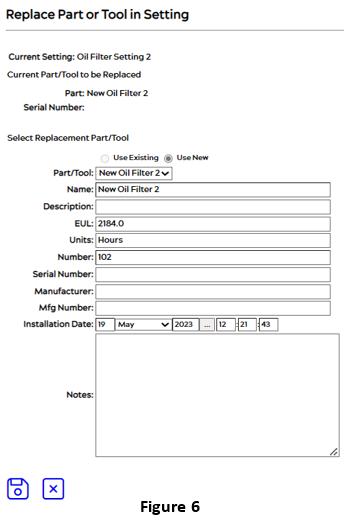
Users can either replace it with an existing part or a new part by selecting one of the options under the first dropdown. Users must then fill out the necessary information accordingly. Once done, click on the save icon ![]() .
.
The ![]() icon in Figure 4 allows the user to uninstall the selected part or move it from one machine to another. Upon selection, a page like Figure 7 (referenced below) will appear:
icon in Figure 4 allows the user to uninstall the selected part or move it from one machine to another. Upon selection, a page like Figure 7 (referenced below) will appear:
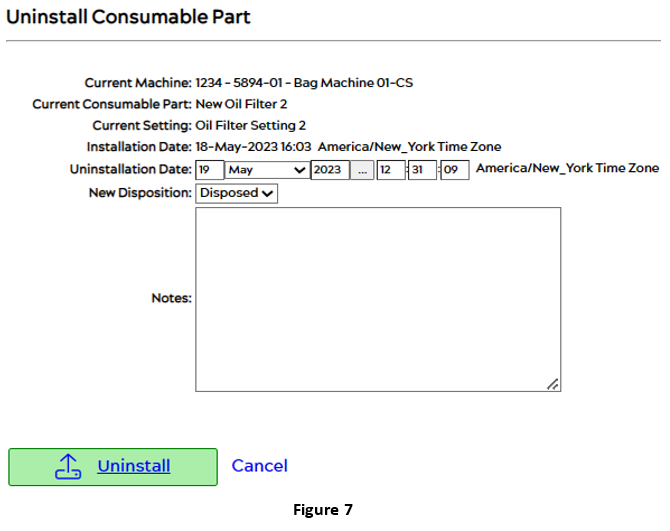
An uninstall or move date must be selected, and users also have the option to add notes to this action. Once done, select Uninstall to complete the process and update the Part on the Machine Details page.
To perform a new maintenance and update the health score of a particular part, the user must either click on the part name or the details icon ![]() in that part’s row, under the Action column as seen in Figure 4. Selecting this icon will bring the user to the Part Details page as seen in Figure 8 below:
in that part’s row, under the Action column as seen in Figure 4. Selecting this icon will bring the user to the Part Details page as seen in Figure 8 below:
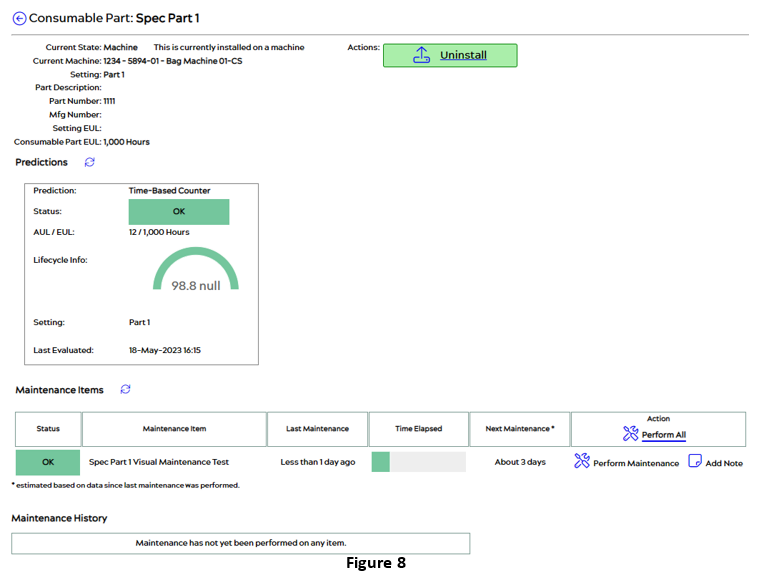
Under the Predictions section, users can see that the Status is OK as indicated by the green Lifecycle Info graphic. The prediction is a health score based on an algorithm that predicts the health life of a component. In this section, users can also see the AUL/EUL of the selected part.
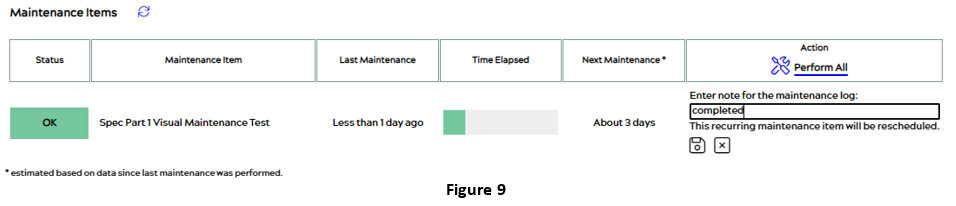
To update the maintenance status of the part, go to the Maintenance Items section of the Part Details page, and click on Perform Maintenance icon ![]() under the Action column. Selecting this will make a page like Figure 9 appear:
under the Action column. Selecting this will make a page like Figure 9 appear:
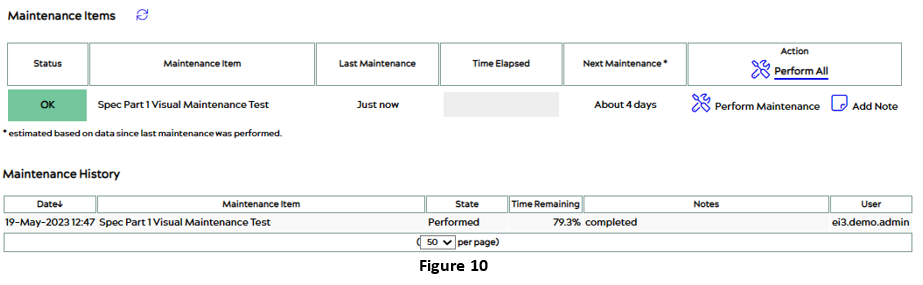
After maintenance has been performed and a note has been entered and saved ![]() , any red Critical, or yellow Warning items will instantly turn into green, and the last maintenance date and time elapsed will change. The Maintenance History will also update, as seen at the bottom of Figure 10:
, any red Critical, or yellow Warning items will instantly turn into green, and the last maintenance date and time elapsed will change. The Maintenance History will also update, as seen at the bottom of Figure 10:
The bottom section of the Part Details page is the Episode History. This section allows the user to track any changes in the location, position, or installation of the part. If the part is replaced, moved, or removed, the episode history will indicate every detail as to what is the status of the part and the date that change has occurred.
