Note: LIFECYCLE can only be used on machines that have the LIFECYCLE product active.
For general information and definitions on parts and assemblies please see this article: LIFECYCLE – Parts and Assemblies.
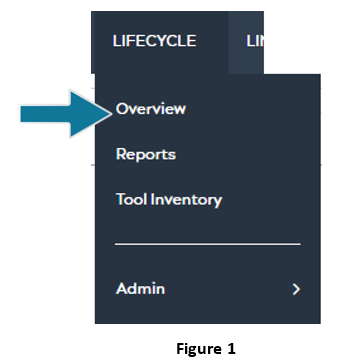
In the dashboard, first start up the LIFECYCLE app, then select Overview:
After selecting Overview, users will be brought to a page, like Figure 2 (referenced below), displaying sections for Parts and Assemblies, and Tools. The Info column shows the number of parts and assemblies in each machine.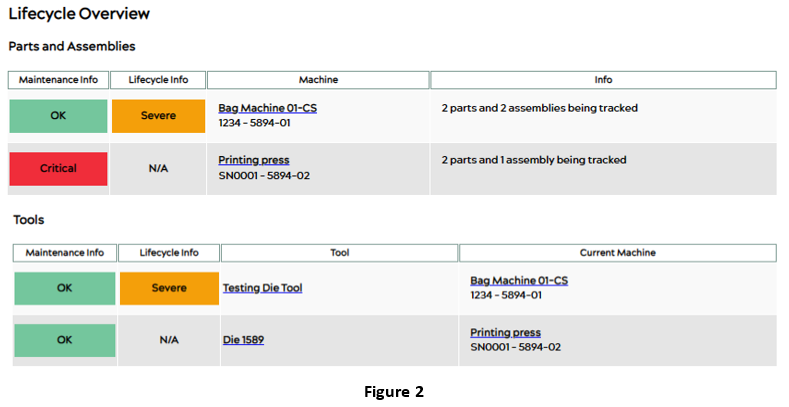
Select one of the machines under the Machine column in the Parts and Assemblies section. Selecting a particular machine will bring users to the Machine Details page, which will resemble Figure 3 below:
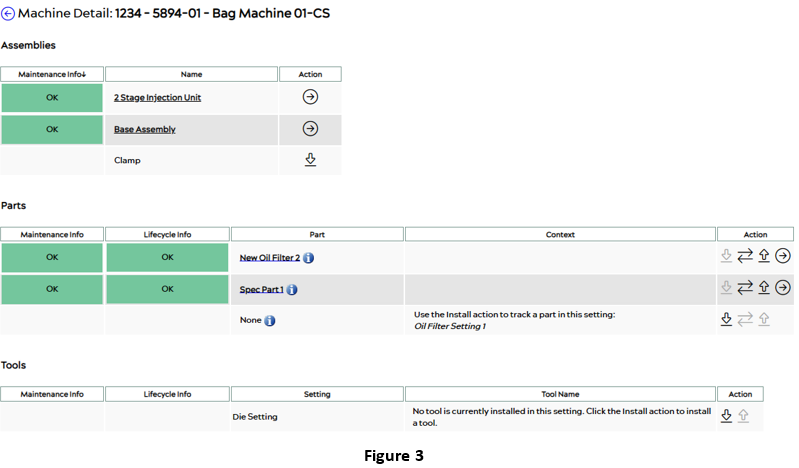
The page on Figure 3 displays the Assemblies, Parts, and Tools for the selected machine.
Assemblies
Figure 4 focuses on just the Assemblies section of Figure 3:
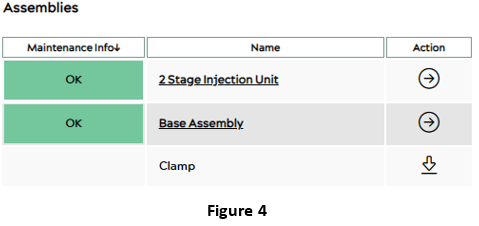
In Figure 4, there are currently two assemblies that have Maintenance Tracking installed: 2 Stage Injection Unit and Base Assembly. The assembly named Clamp has not yet begun Maintenance Tracking.
The Begin Maintenance Tracking icon ![]() allows users to add an assembly to the Assemblies list and begin tracking it. When this icon is selected for a specific assembly name, the user can write a description and choose an installation date for the selected name as seen in Figure 5:
allows users to add an assembly to the Assemblies list and begin tracking it. When this icon is selected for a specific assembly name, the user can write a description and choose an installation date for the selected name as seen in Figure 5:
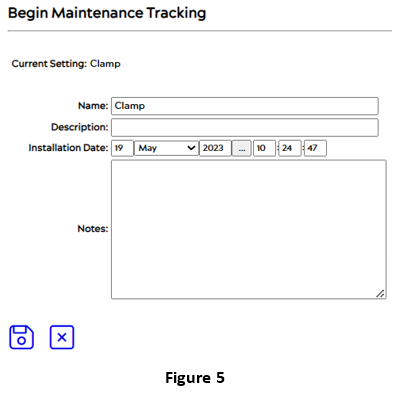
Users can edit or add any information necessary for the selected assembly. Once done click on the save icon. ![]()
To exit the Begin Maintenance Tracking page and return to the Machine Details page, select the ![]() icon.
icon.
From Figure 4, clicking on the name of an assembly that has Maintenance Tracking installed or on the Details icon ![]() under the Action column, will take the user to the Assembly page as shown in Figure 6:
under the Action column, will take the user to the Assembly page as shown in Figure 6:
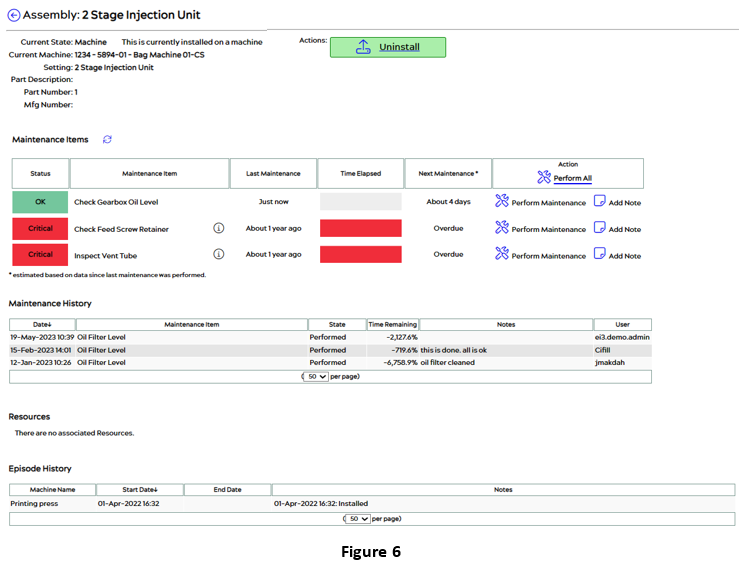
To update the maintenance status of an assembly, users must click on the ![]() icon next to Perform Maintenance in the last column under Action, bringing users to a page that resembles Figure 7 below:
icon next to Perform Maintenance in the last column under Action, bringing users to a page that resembles Figure 7 below: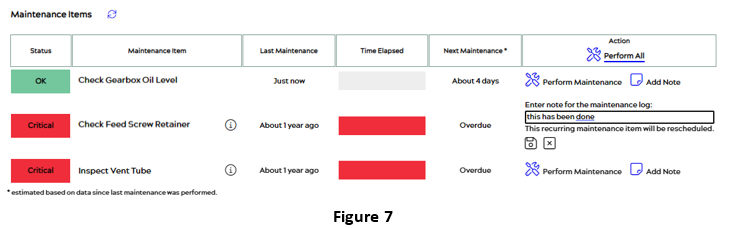
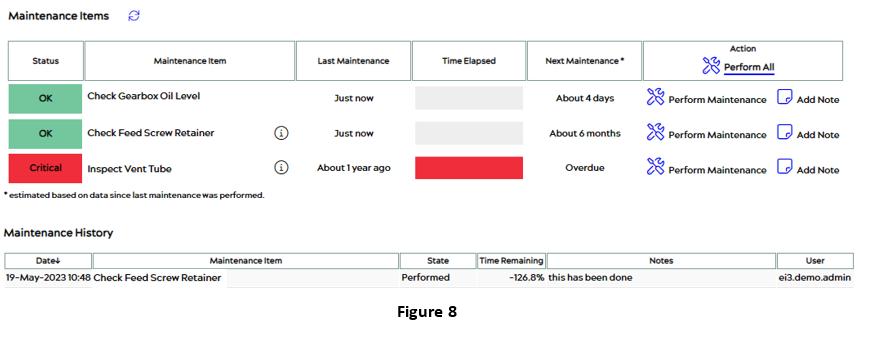
After maintenance has been performed and a note has been entered and saved ![]() , any red Critical or yellow Warning items will instantly turn green, and the last maintenance date and time elapsed will change. The Maintenance History will also update, as seen in Figure 8:
, any red Critical or yellow Warning items will instantly turn green, and the last maintenance date and time elapsed will change. The Maintenance History will also update, as seen in Figure 8:
The bottom section of the Machine Details page in Figure 6, is the Episode History. This section allows the user to track any changes in location, position, or installation of the assembly. If the assembly is replaced, moved, or removed, the episode history will indicate every detail as to what is the status of the assembly and the date that the change has occurred.
