The Tool Tracking feature is used to track your Tool’s activity from one machine to another and view its Lifecycle and Maintenance information. Tool Tracking helps you track where your Tool is currently located, as well as where it was used in the past. With this capability, ei3 will also allow you to maintain your tools using our predictive and preventative maintenance features.
Before using Tool Tracking, make sure that automatic tracking has been set up by your administrator, and that all your Tools have been created and added to the system. Also, ensure that Jobs have been created and are running on your machines.
Navigating the Tool Inventory Page
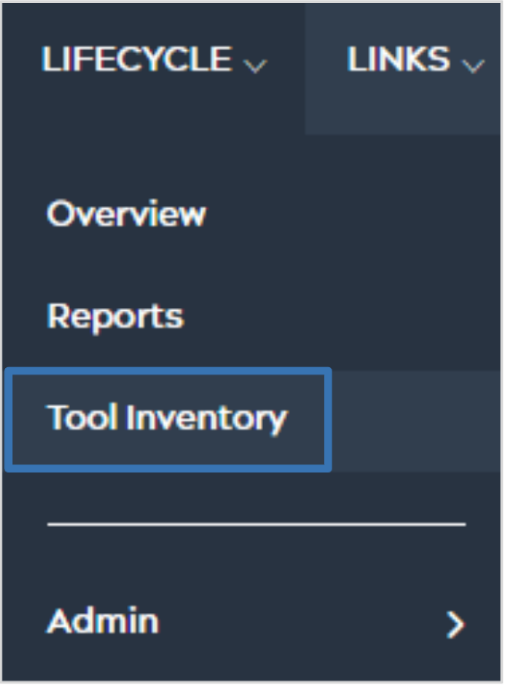
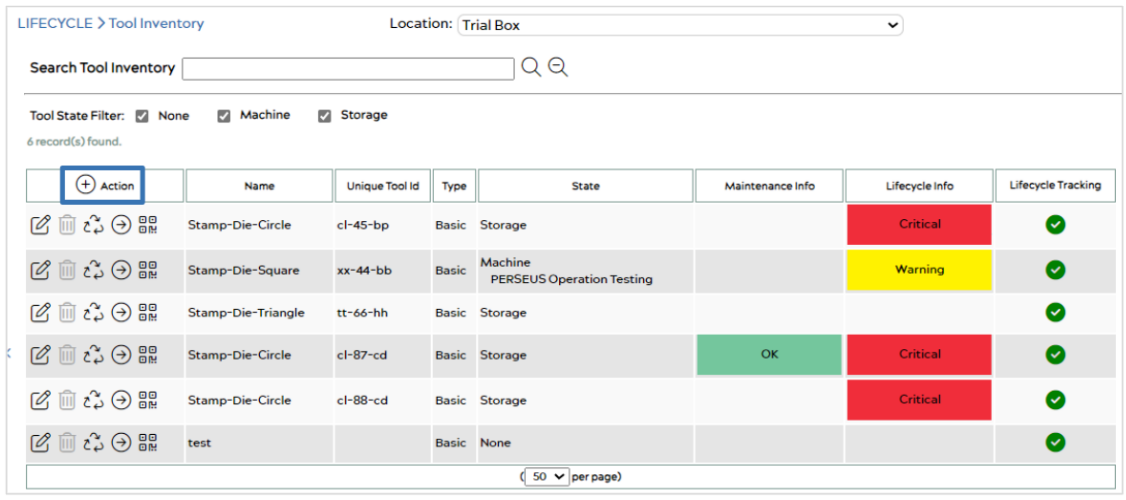
To access the Tool Inventory page, first navigate to LIFECYCLE on the top menu, and then select Tool Inventory, which will bring you to a page similar to the one below.
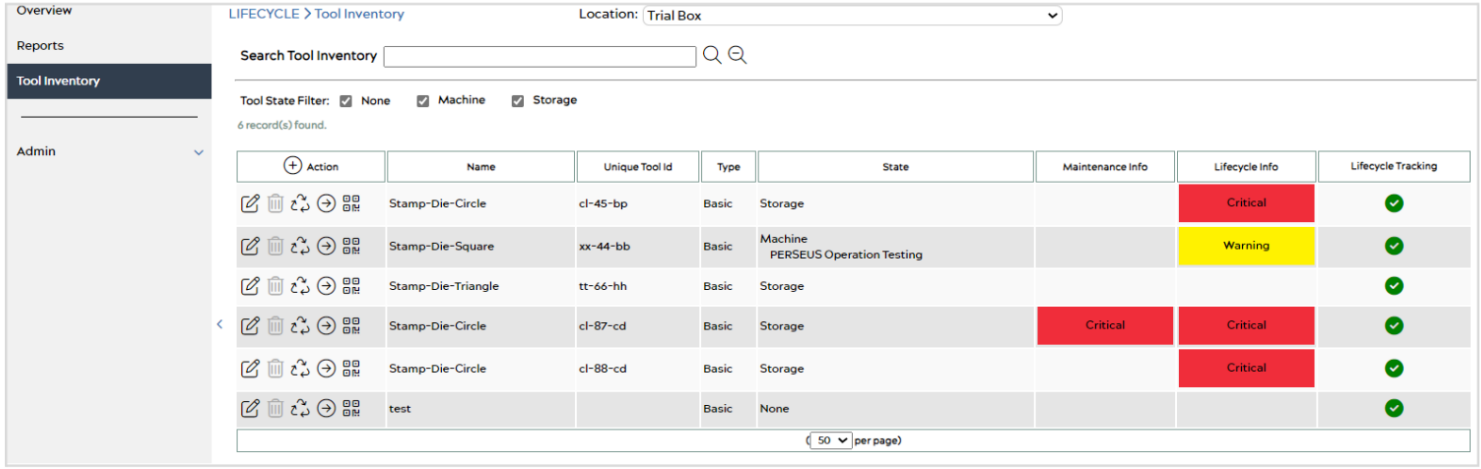
At the top of the page, there is a Location bar where you can select which location’s tools you would like to view.
Under that, you can search through your tools using the search bar, and/or use the filters below it. Tools can either be on a machine or in storage, and you can choose which category you would like to view by checking its box. When you install/load a tool onto a machine, the status of that tool updates to being in the “Machine” state. When a tool is not yet installed or has been unloaded from a machine, the status is in the “Storage” state. If a tool has not yet been set up for Tool Tracking, it may be in the “None” state.
Below these search and filter options is the table that displays all the information about your tools.
This table displays the Name, Unique Tool Id, Type, State, Maintenance Info, and Lifecycle Info for each tool. The last column, Lifecycle Tracking, simply displays a green checkmark ![]() if Lifecycle Tracking has been enabled for the tool.
if Lifecycle Tracking has been enabled for the tool.
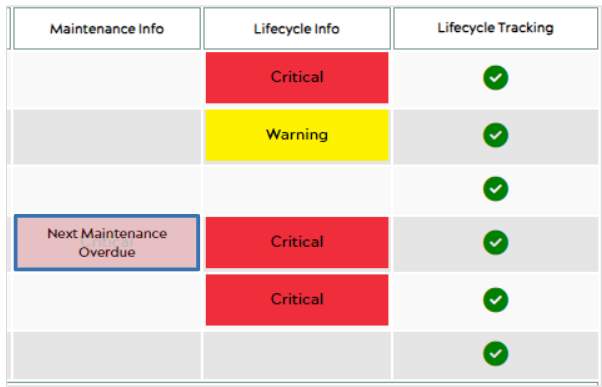
Hovering over a tool’s status under Maintenance Info (e.g., OK, Warning, Critical, etc.) will display when the next maintenance needs to be performed on that tool. In the example below, maintenance is Overdue and the status is Critical.
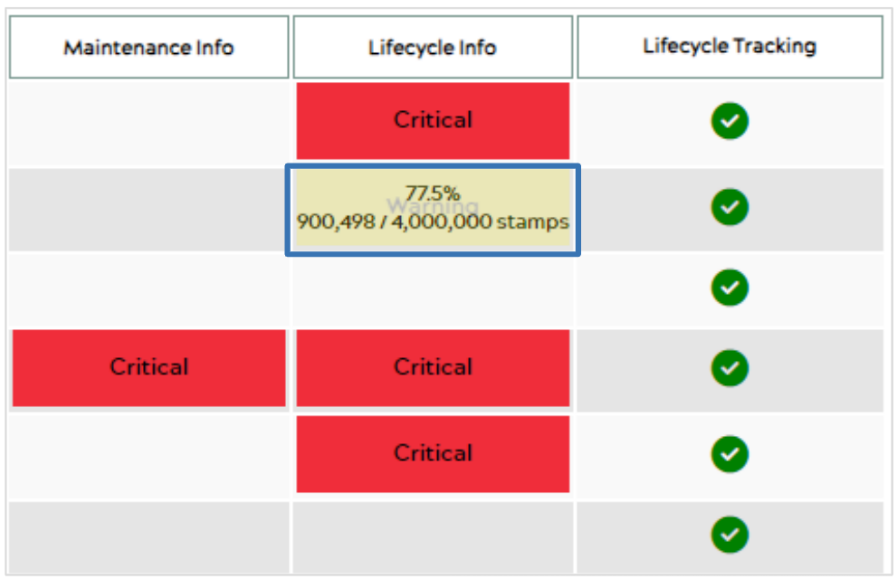
Hovering over a tool’s status under Lifecycle Info (e.g., OK, Warning, Critical, etc.) will display what percentage of that tool’s lifecycle remains, as well as the amount of usage so far over the estimated useful life (EUL).
Tool Inventory Actions
Under the leftmost column in the Tool List are the Action icons. Each tool has five different actions to pick from. You can Edit a tool by selecting the Edit icon ![]() , which will bring you to the Edit Tool page, similar to the one below.
, which will bring you to the Edit Tool page, similar to the one below.
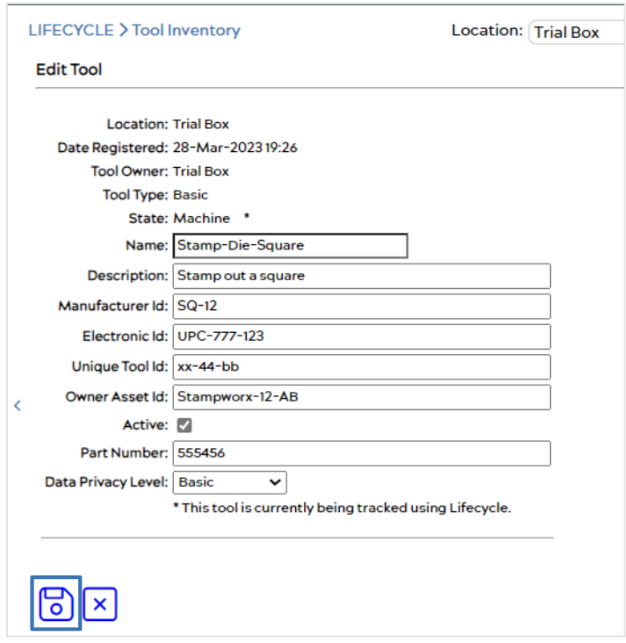
Here, you can make changes to your tool’s information, and then save your changes using the Save button ![]() at the bottom of the page.
at the bottom of the page.
The next button under the Action column is the Delete button. Only ei3 admins have the authority to delete a tool, so unless you are an ei3 admin, the button will appear grey and not selectable ![]() .
.
The third is the Manage Lifecycle button ![]() . Upon selection, you will be brought to the Manage Lifecycle Tracking page, similar to the one below.
. Upon selection, you will be brought to the Manage Lifecycle Tracking page, similar to the one below.
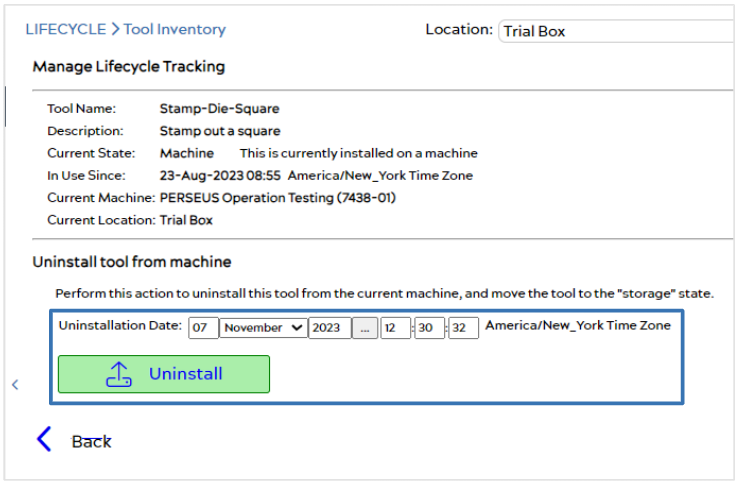
At the top of the page, you can see the Tool’s information including its Name, Current State, the date it was installed on a machine, the Current Machine it is installed on, and the Current Location it resides in.
Below this information is where you can Uninstall a tool from its current machine, moving it to “Storage”, or disposing of it. You can input its Uninstallation Date if you wish to set an uninstallation for a past date, or leave the default current date and time, and then uninstall the machine using the ![]() button.
button.
The fifth and last button under the action column is the Download QR Code button ![]() . Upon selection, the Tool’s QR code will automatically download onto your device. Depending on your configuration, you may be able to use the QR code with the companion ei3 Mobile Portal app.
. Upon selection, the Tool’s QR code will automatically download onto your device. Depending on your configuration, you may be able to use the QR code with the companion ei3 Mobile Portal app.
Tool’s Lifecycle Information
The fourth button under the Action column is the Show Tool Info![]() button, which will bring you to a page similar to the one below displaying the Lifecycle information for that particular tool.
button, which will bring you to a page similar to the one below displaying the Lifecycle information for that particular tool.
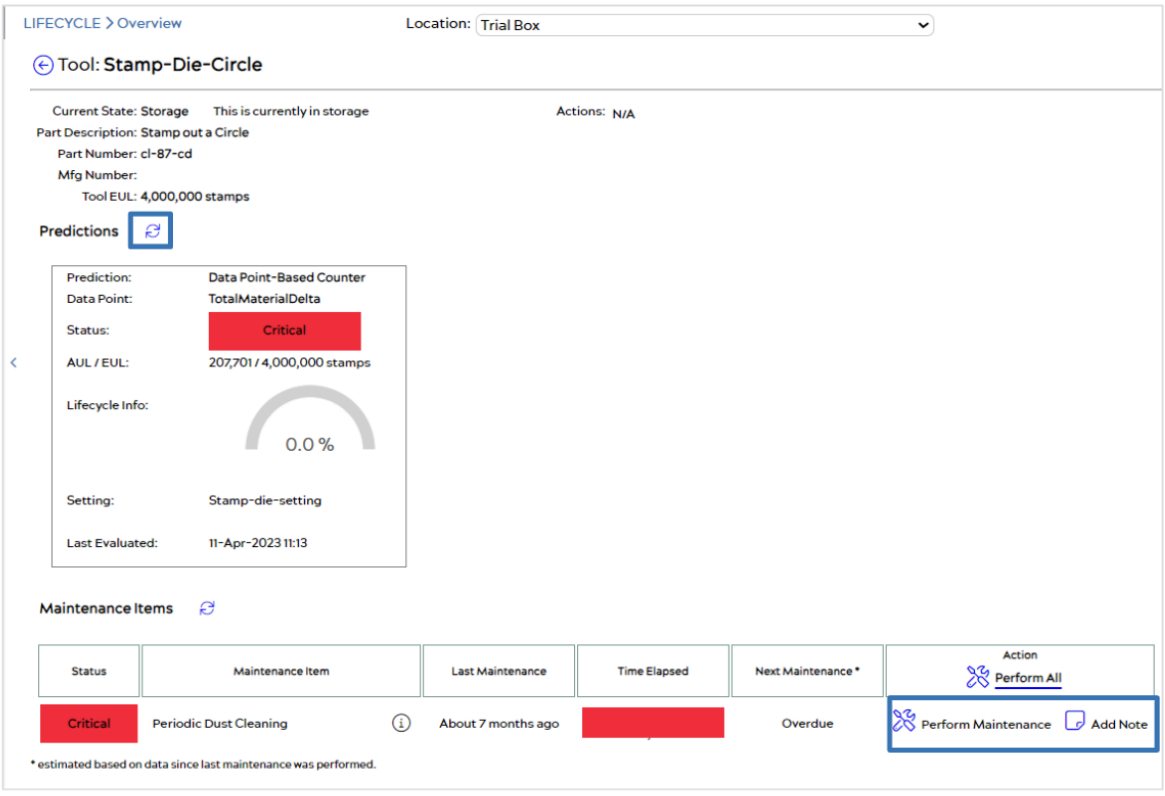
The top of the page displays the Tool Name and relevant information about the tool including the Machine it’s currently on and its Machine State, its Setting, Part Description and Number, Setting EUL, and Tool EUL. To the right of this information, you can Uninstall the tool by selecting the ![]() button, as long as your tool is currently installed on a machine. In the example above, this machine is in storage, so there is no Uninstall button
button, as long as your tool is currently installed on a machine. In the example above, this machine is in storage, so there is no Uninstall button
Below this information is the Predictions data section. Here, you can see your Tool’s Lifecycle information including what percentage of that tool’s lifecycle remains (in the semicircle bar) and how many cycles have run out of the maximum amount before maintenance is required. Selecting the Refresh button ![]() will refresh the Tool’s Lifecycle data.
will refresh the Tool’s Lifecycle data.
Below this is the Maintenance Items section, which shows you the Status of each Maintenance Item that has been set up for the tool. For each item, you will see the last time Maintenance was performed, how many Cycles have elapsed since the last Maintenance, and how much time the Tool has left before its Next Maintenance. Finally, this section allows you to Perform Maintenance on individual maintenance items by selecting the ![]() button. After performing physical maintenance on a tool, you can use this feature to note and keep track of what you have done. After performing maintenance, the status will be updated to OK, like in the image below.
button. After performing physical maintenance on a tool, you can use this feature to note and keep track of what you have done. After performing maintenance, the status will be updated to OK, like in the image below.

If there are multiple maintenance items configured for a tool, you may wish to use the Perform All action, which will update all maintenance items at once.
Scrolling down on this page will display even more information about the selected tool Tool, as seen below.
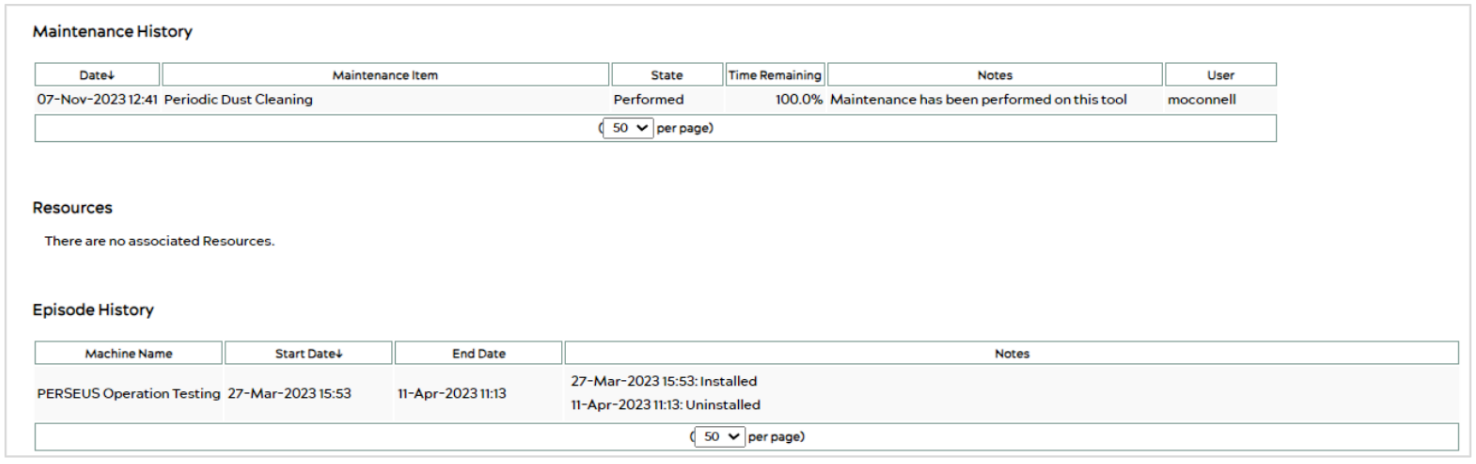
You can see the Tool’s Maintenance History in the first table. This gives details about when and what maintenance was performed on the tool in the past, including notes and how much time remained on that Tool’s lifecycle when Maintenance was performed.
Under that is where any Resources associated with the selected tool would be located. Admins can add Resources under LIFECYCLE > Admin > Tools. See this article for more information on how to add resources: How to Edit Existing Tools and Add Maintenance Items – LIFECYCLE – ei3 Knowledge Database
Finally, you can view the Tool’s Episode History which shows which machine the tool has been on in the past, and how long it was installed. It also displays if the tool was being automatically tracked, and any relevant notes created.
Creating a New Tool
In the main Tool List page, next to the first column header, Action, is the New button ![]() , which upon selection, brings you to the New Tool page, like the one below.
, which upon selection, brings you to the New Tool page, like the one below.
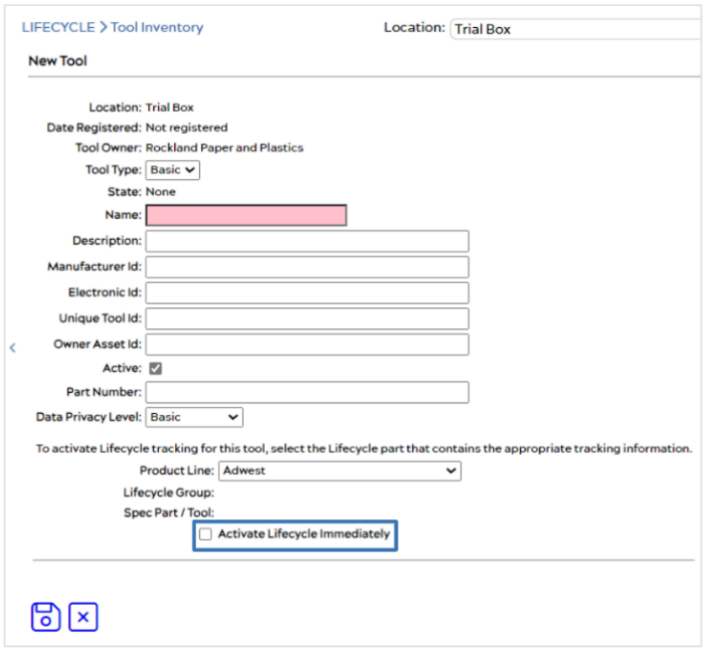
This page allows you to create a new tool. First, select the Tool Type from the dropdown menu, then give your tool a Name and Description. If applicable, you can also add the Manufacturer ID, Electronic ID, Unique Tool ID, Owner Asset ID, and Part Number. You can select the Active box to activate your tool, and then choose a Data Privacy Level from the dropdown.
Finally, at the bottom, you can activate Lifecycle Tracking for the tool by selecting a Product Line, selecting the corresponding Lifecycle Group, and selecting the box next to Activate Lifecycle Immediately. When finished, save your changes by clicking the Save button ![]() at the bottom of the page.
at the bottom of the page.
