This feature requires an active subscription for the DOWNTIME app on your machine.
The DOWNTIME app enables users to identify root causes of downtime events in order to maximize machine productivity.
For more information on downtime please click here.
1. Select a schedule
For more information on creating machine schedules, see New Schedule Creation.
To edit an existing schedule, select the desired schedule from the list displayed, and select the ![]() icon.
icon.
For more information on making modifications to machine schedules, see Changing & Editing Schedules.
2. Create “No Production” Shifts
For the desired time periods, create a No Production shift and assign it to the necessary time periods. To configure a shift as No Production, uncheck the box in the PO column.
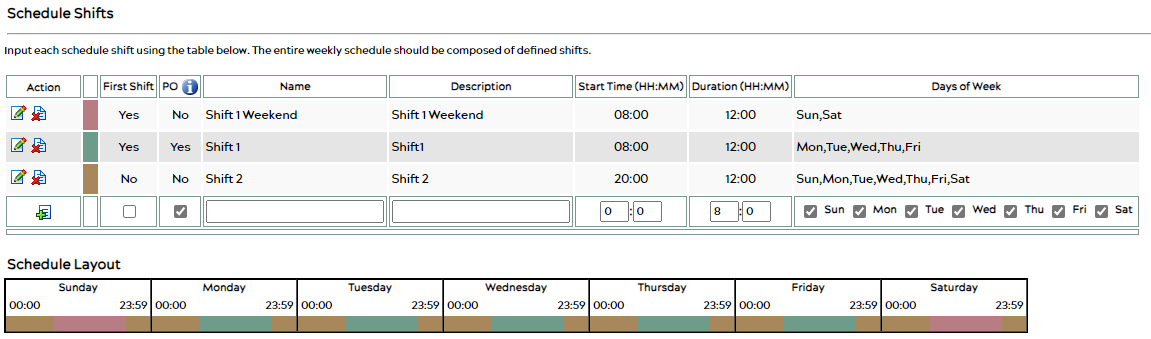
Use shift templates to find a pre-made shift schedule to fit your needs. A temp – 2/8/5 or 3/8/5 schedule has built-in shifts for weekends pre-designated as No Production.
3. Apply Assigned Downtime
For more information on downtime, see Performance & Downtime
From the top menu in the Customer Portal, select DOWNTIME.
From the histogram on the Assign page, find and select the designated No Production shift for your machine.
Use the date selection tools (found by clicking the ![]() icon at the top) on the Assign page to find the specific time frame you’re looking for.
icon at the top) on the Assign page to find the specific time frame you’re looking for.
Choose the category Scheduled and code Scheduled Downtime, then hit the ![]() icon to save.
icon to save.
See also: Assigning Downtime Codes, Shift Schedules
