Introduction
Entering scrap data and associating them with their respective categories and codes helps your business identify bottlenecks as well as accurately calculate your production quality. Its aim is to increase the quality of material produced resulting in a higher OEE value and therefore efficiency. This article provides various examples of special cases you may encounter when entering your scrap data, and how to go about entering data for them.
Prerequisites
Please note the following prerequisites in order to start using Scrap Tracking in ei3:
- In order to access Scrap Tracking, users must have an active PRODUCTION subscription for the machine.
- Each machine must have a Shift Schedule assigned to it and data collection must be active with the data validated by the machine owner.
- Scrap codes and categories must be created by an Admin user before entering scrap data. If there are no codes and categories, have an Administrator add them.
- Before reading this article, please read How To Enter Scrap Data, to learn how to enter Scrap data before reading these special cases.
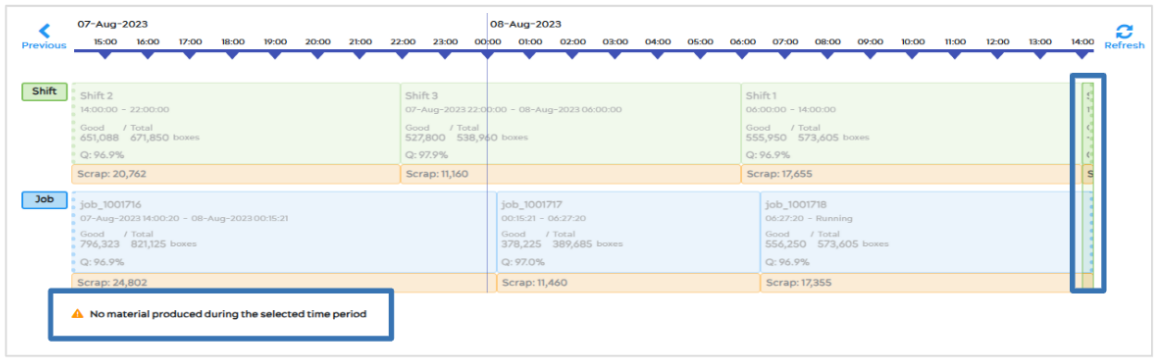
Example 1: Time periods with no job and no material produced
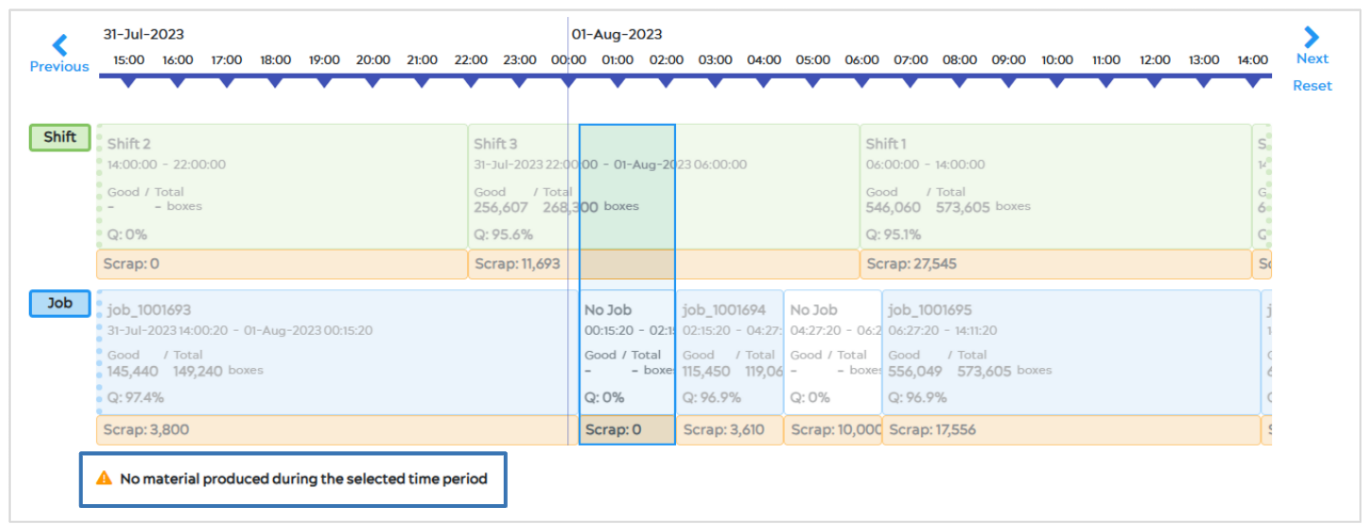
If you select a white, “No Job” time period, where no material was produced, you will see the error “No material produced during the selected time period”, indicating that you cannot enter scrap into this section. For more information on these time periods please refer to How To Enter Scrap Data: Selection of a “No Job” Time Period.
![]()
Example 2: Multiple job runs in a shift
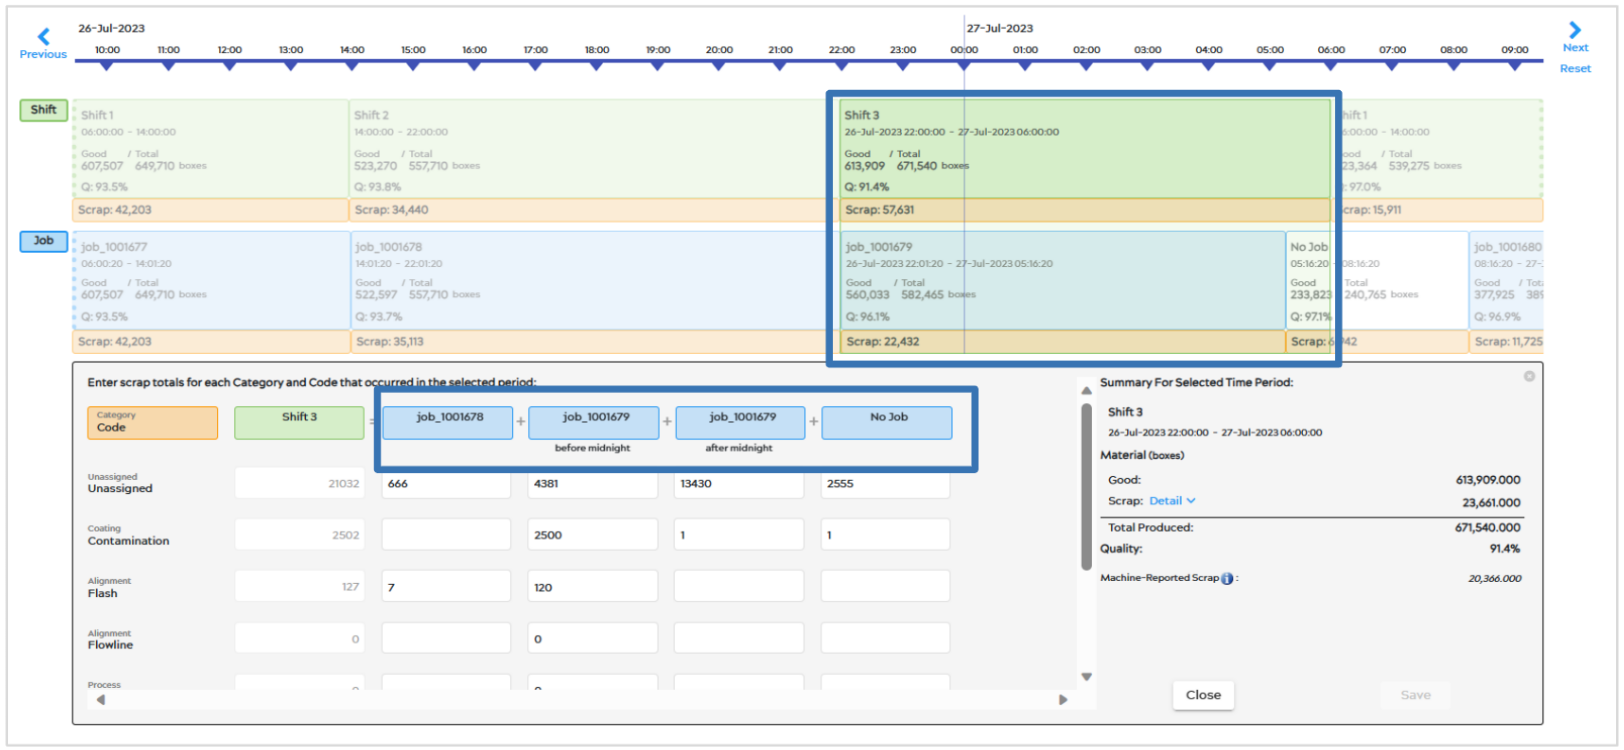
When you select a shift during which more than one job ran, there will be multiple columns to enter scrap. In this example, there are 3 jobs, but four columns. The second job extends past midnight, so you must enter data separately for the time periods before and after midnight. The last column is labeled “No Job” and represents the time in-between jobs when no job was running, but material was still being produced. You can enter scrap data for each of the different time periods represented by separate columns in this singular entry panel. A different scrap code is presented in each row, and the total quantity of scrap entered for all time periods of the shift are summed for the shift in the column on the left side.
![]()
Example 3: Overnight shifts
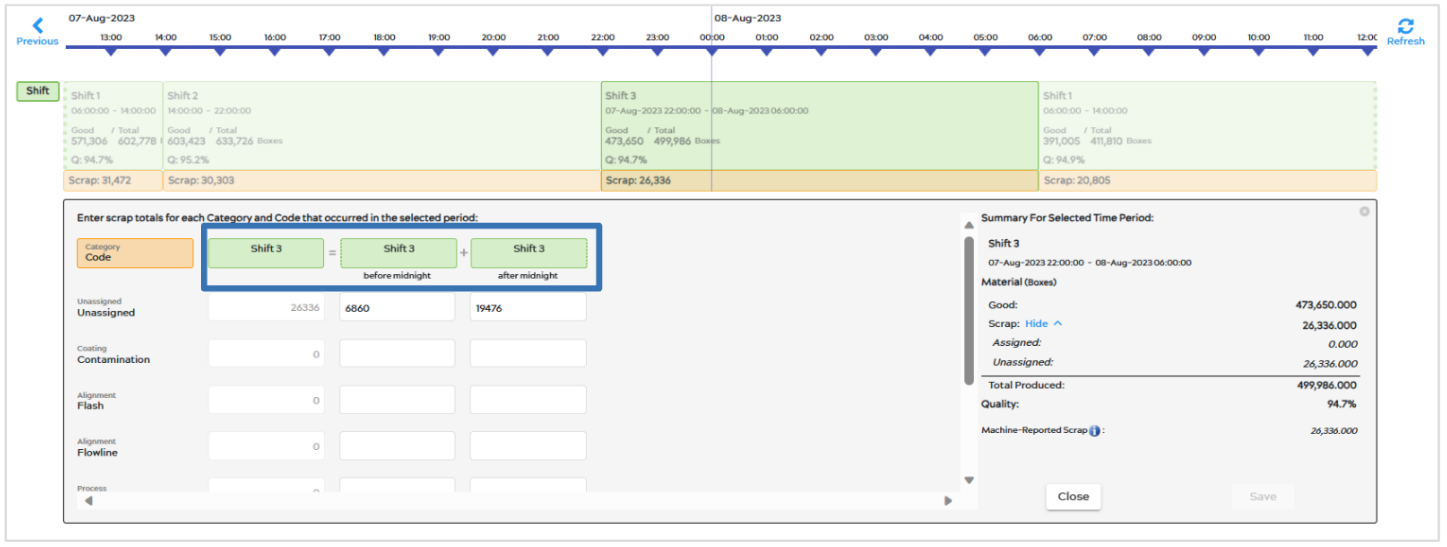
If your machine has no jobs being reported to ei3, there is usually only one entry column for each selected shift. The exception to this can be seen below when a shift crosses midnight. For this, you will have to enter data for each time period before and after midnight. The first column will automatically sum the entries from the time periods before and after midnight.
![]() Example 4: Multiple users
Example 4: Multiple users
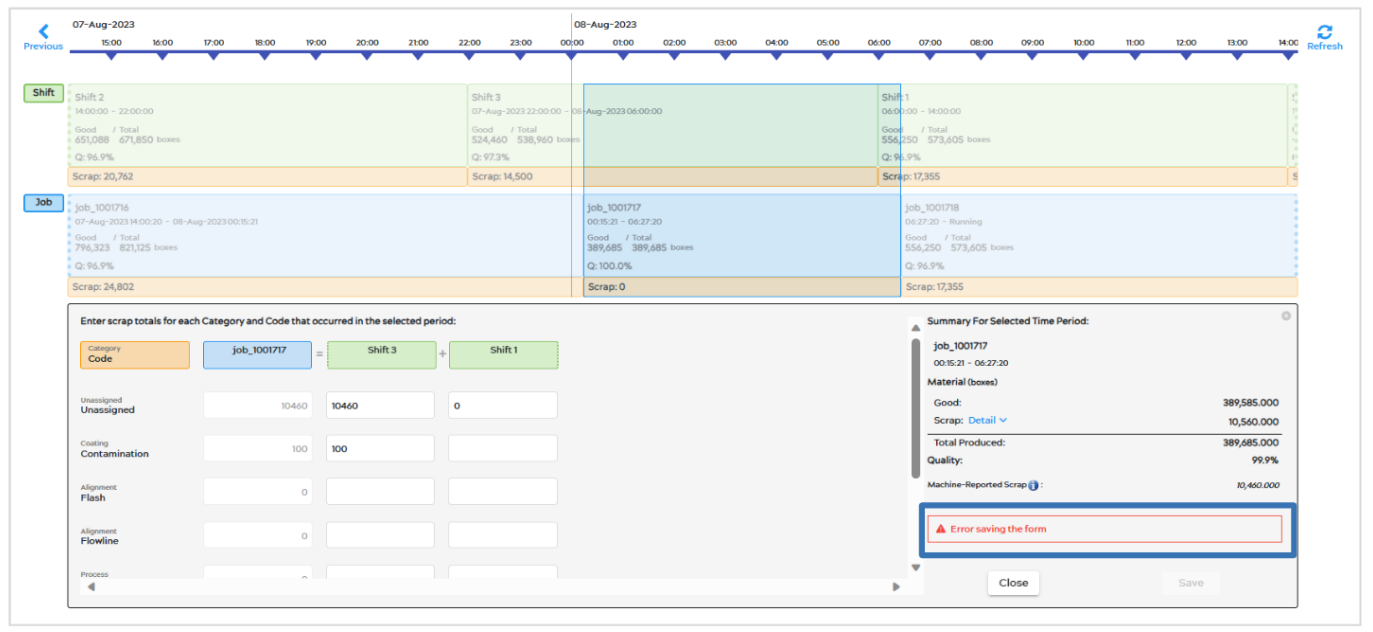
If two users are trying to enter scrap data at the same time, an error message will appear that says “Error saving the form”, and users will have to ensure that only one person is attempting to enter data at a time.
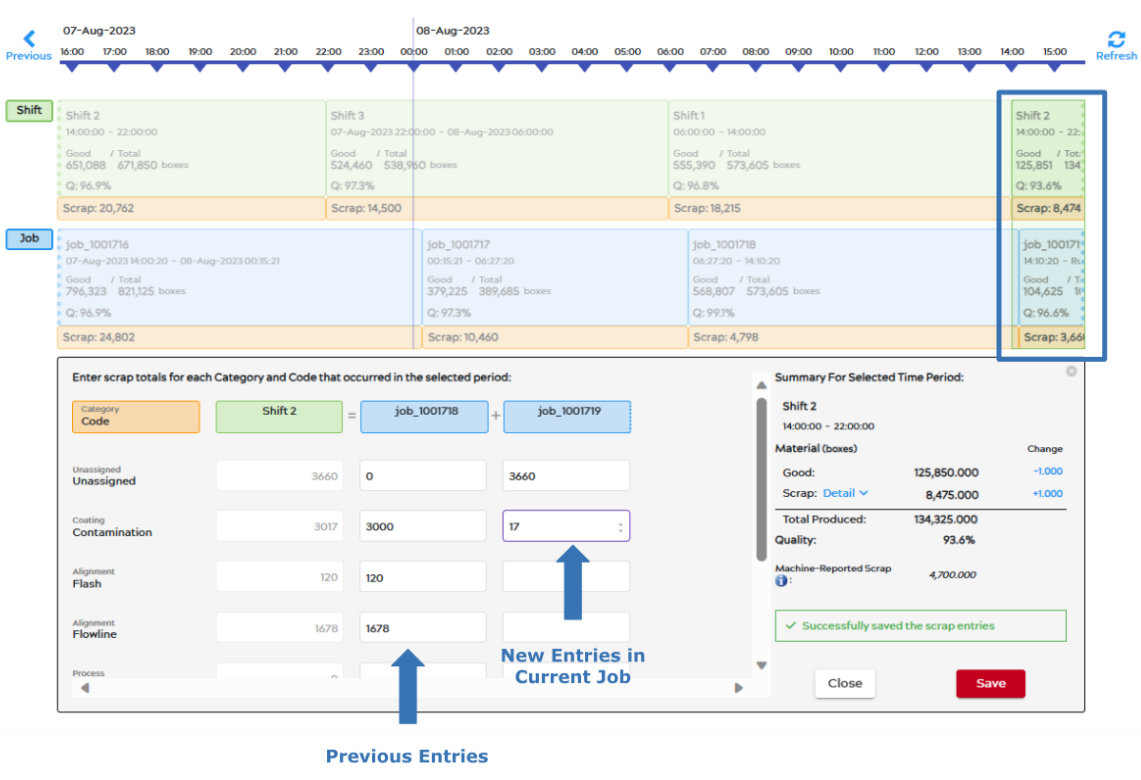
Example 5: Current shift or job in process
During the current shift, whether or not there is a current job running, you can enter data and you do not have to wait for the shift or job to be completed. Any saved edits previously made by users will remain, while the total material and unassigned scrap material will continue to update with the machine production. You can update the scrap entries as they happen.
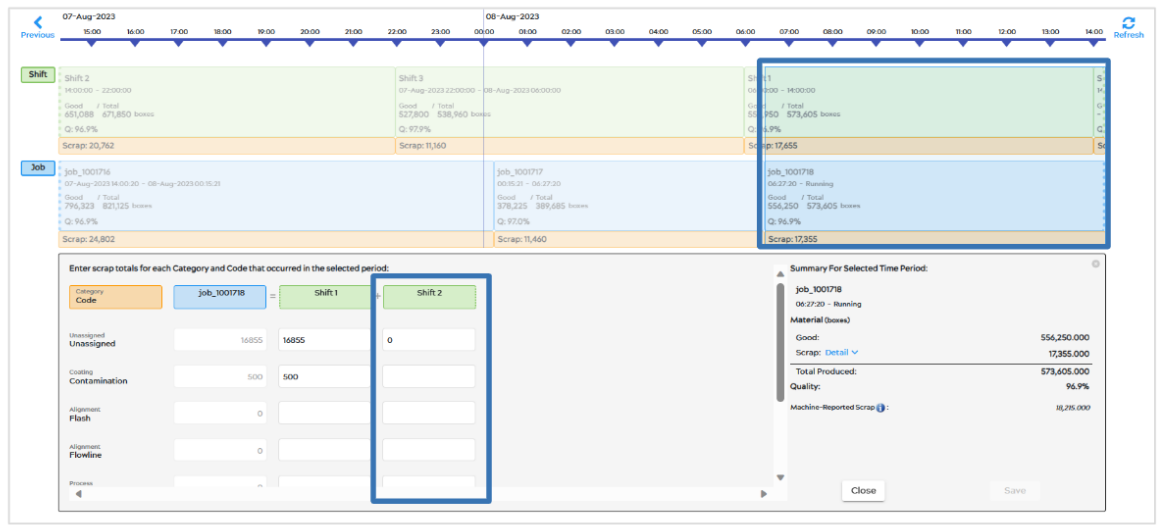
Example 6: Job runs that briefly cross a shift start or end
When selecting a job, there may be times when the job either started just prior to the start of a shift, or the job ended just after the end of a shift. As you can see in the images below, the job started just before a new shift (Shift 2) and so the job ran only a small sliver of a time in the prior shift. When selecting the current job, you can see in the first image that there is no data yet tracked for this new shift. Then, as you can see in the second image when selecting the newly started shift, an error appears saying “No material produced during the selected time period”. If you wait 2-3 minutes, the data should update, and you will be able to see all the data for that shift and make your entries.
![]()
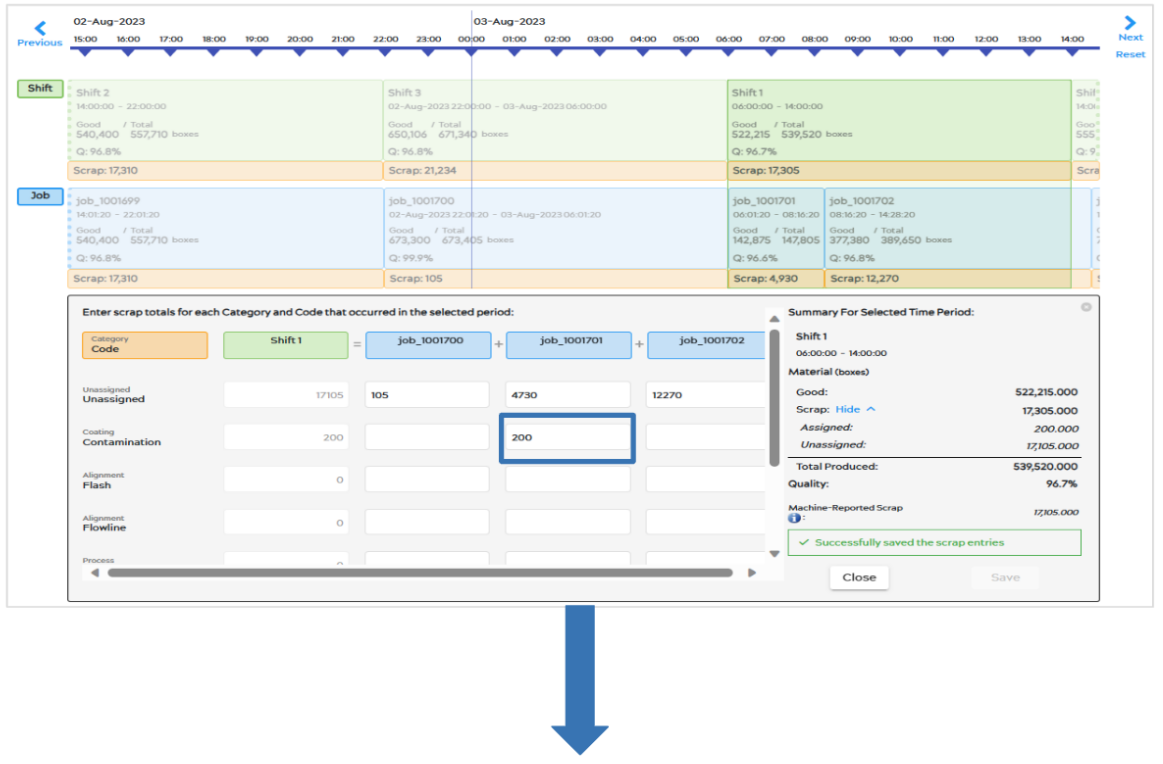
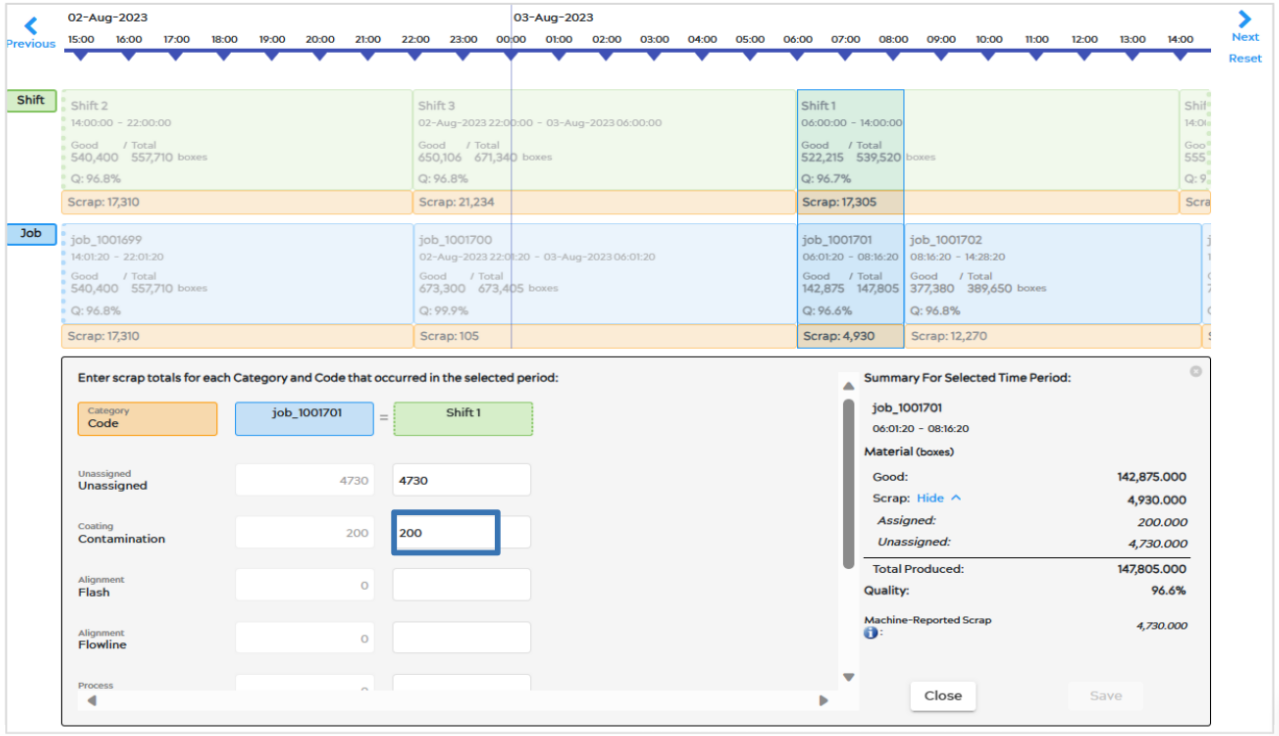
Example 7: Entering scrap data for a job within a shift
There are two ways you can enter scrap data for a job that ran completely within one shift. If you select the job, you will only be prompted to enter data for that singular time period of the job, as seen below. The column label will indicate the shift name. ![]()
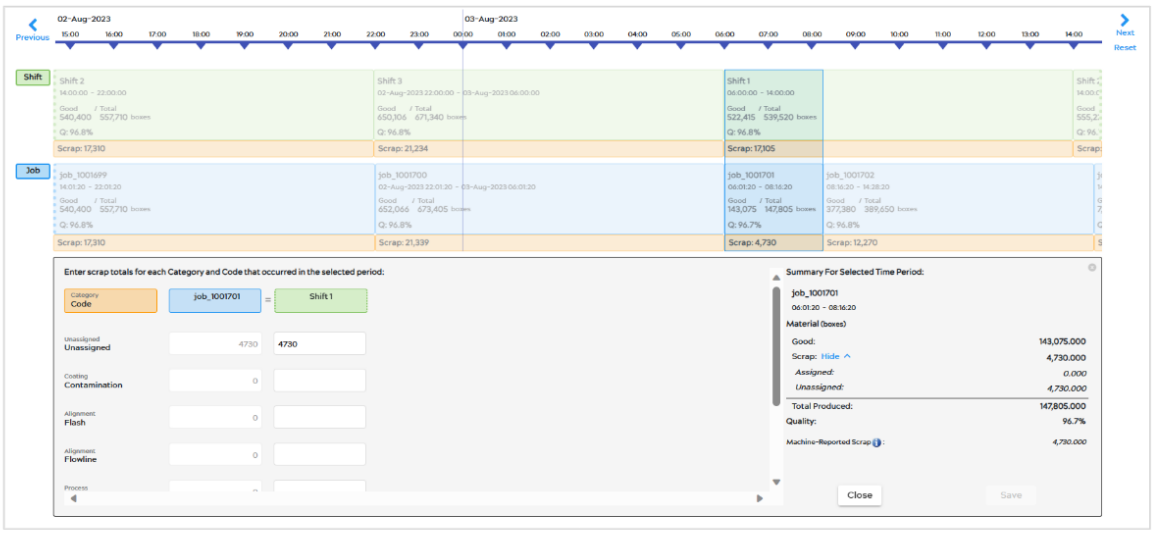
Alternatively, you can select the shift that the job ran in, then enter data into that individual job. For example in the images below, shift 1 was selected then 200 units of scrap were entered for job_1001701 (the job that falls entirely within that shift). Then, when you select the job time period, you can see that data saves and there are 200 units for scrap. Any remaining material is still labeled as unassigned scrap. Although not shown, after adding 200 units of scrap, you can also decrease the unassigned scrap by that same amount in order to keep the amount of “Good” material the same.![]()
Example 8: Jobs that run overnight
When you want to enter data into a job that extends across the midnight boundary, you will have to enter data for each of the time periods before and after midnight. In the example below, Shift 3 was selected which encompasses two jobs, one of which crosses midnight. Like the previous example, data you enter when a shift is selected will save and appear when the individual job is selected. ![]()
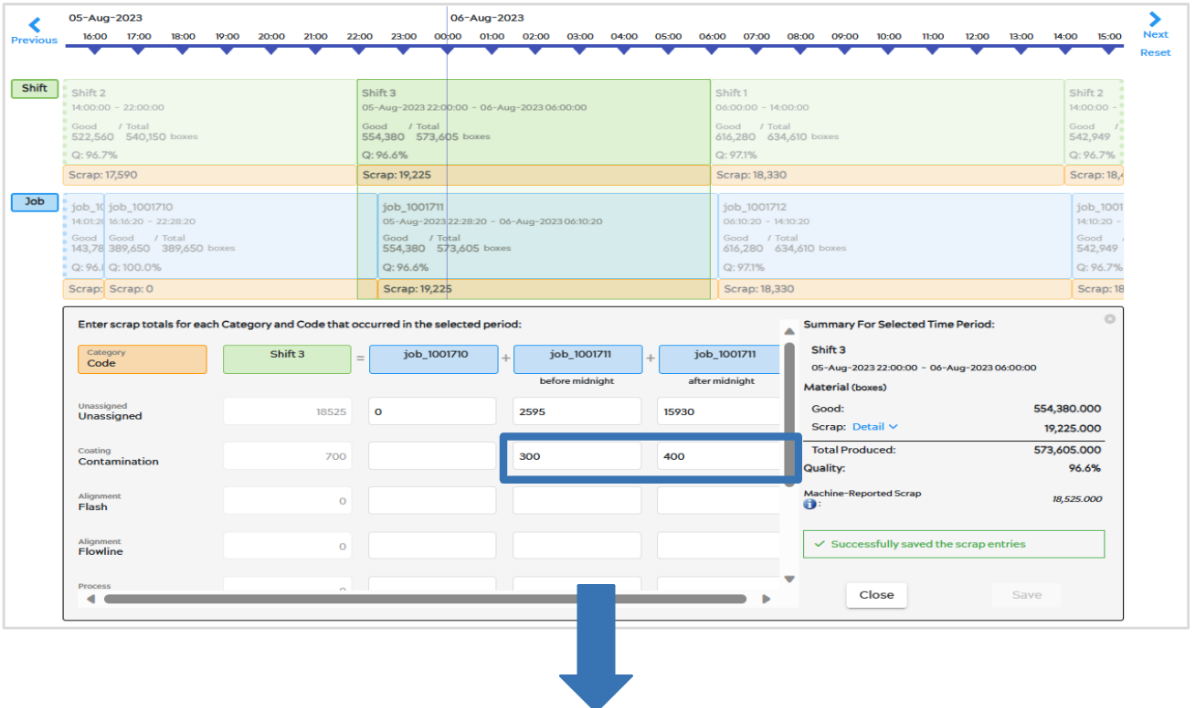
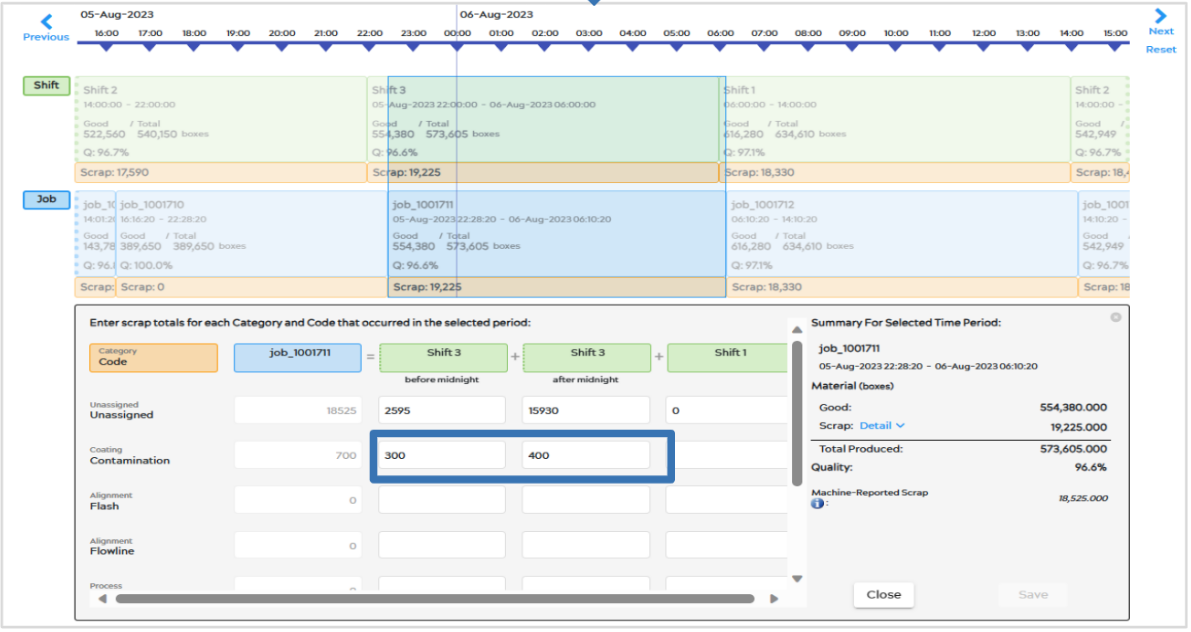
300 units of scrap were entered into the Contamination code before midnight, and 400 after midnight for job_1001711. As you can see, this data also appears when you select job_1001711, appearing in the Shift 3 before and after midnight columns.
