Introduction
The Operator Mode allows you to enter scrap data in real time for the current shift or job that the machine is running. This mode allows a user to enter scrap values and assign them to specific Categories and Codes during the current time period for the machine.
Prerequisites
Please note the following prerequisites:
- In order to access Scrap Tracking, users must have an active PRODUCTION subscription per machine participating in scrap tracking.
- Each machine must have an accurate Shift Schedule assigned to it.
- Scrap codes and categories must be created by Admins before entering scrap data. If there are no codes and categories, have an Administrator add them.
You can access the Pareto tool from PRODUCTION > Scrap > Operator Mode.
Assigning Scrap
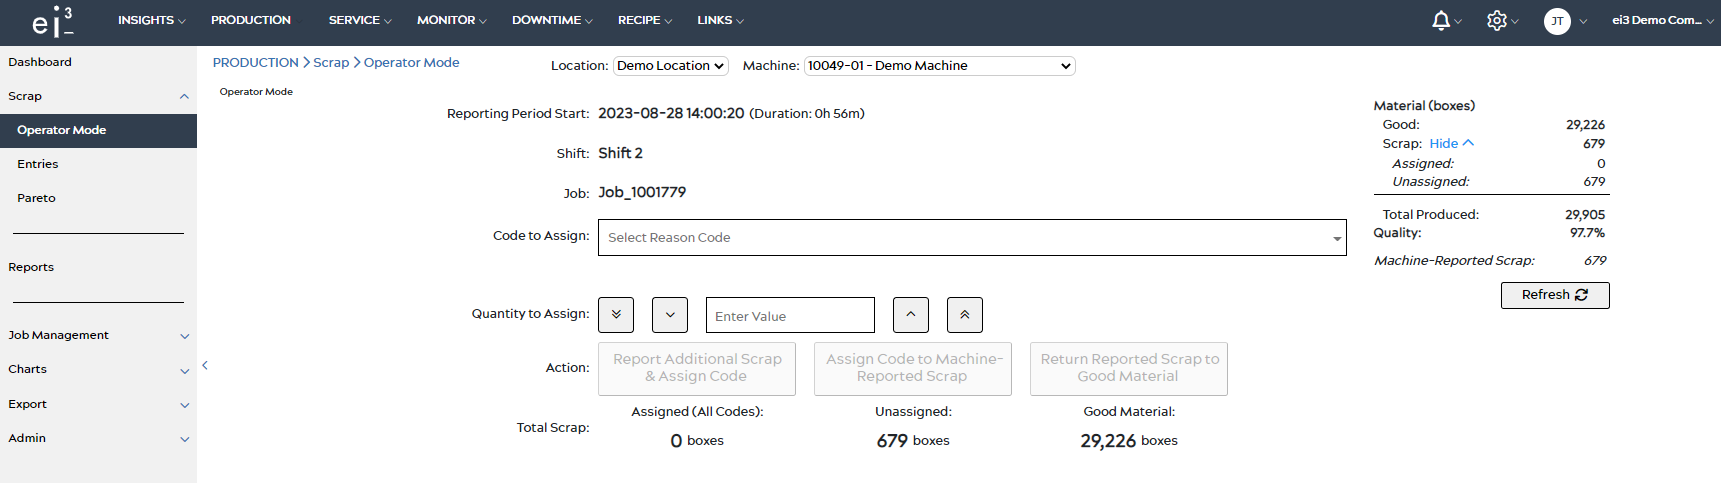
At the top of the page you can select the location and machine for which you want to enter scrap data.
Reporting Period Start: This indicates the start time of the reporting period. The reporting period will start at the most recent of the following events: the start of a new shift, the start of a new job, the end of a job when there is no current job, or Midnight. Note that when a job ends, but no new job starts at the same moment, we will have an interim “no job” segment.
Shift: This indicates the current shift.
Job: This indicates the current job that is running on the machine, when relevant.
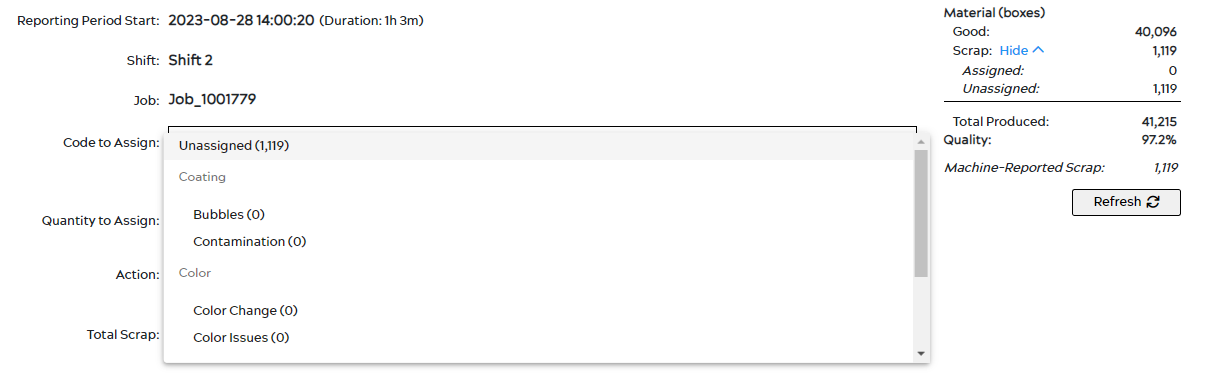
To assign scrap you must first select a code from the Code to Assign drop down menu.
If you do not have codes and categories set up yet, please visit this article.
Each code in the list is followed by a number in parentheses. This number indicates the quantity of scrap material that has already been assigned to that code during the current Reporting Period.
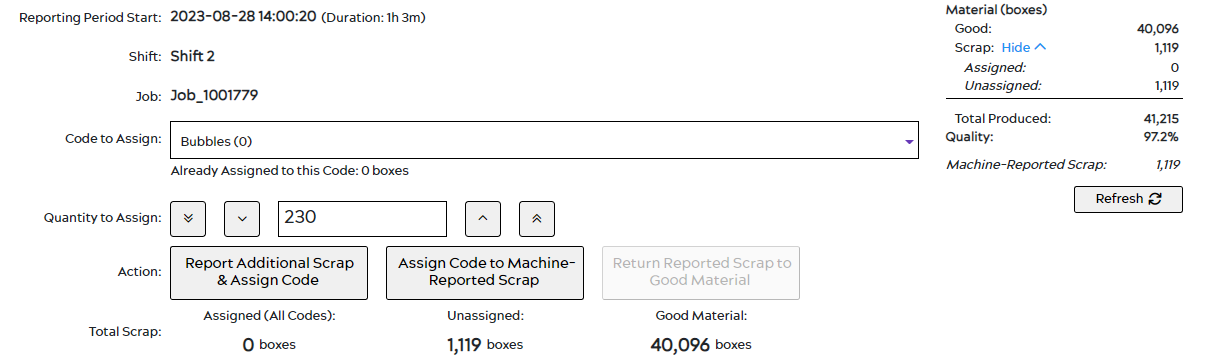
Once you have selected a code to assign scrap to, you can enter the scrap amount in the Quantity to Assign field.
You can also choose to increase or decrease the entered value with increments of 10 with the following buttons ![]() and
and ![]() respectively, or even with increments of 100 with the following buttons
respectively, or even with increments of 100 with the following buttons ![]() and
and ![]() respectively.
respectively.
Now that you have selected a scrap code and entered a scrap quantity , you may select one of three options:
1. Report Additional Scrap & Assign Code: This option allows you to add new scrap data that was not previously reported by the machine. Selecting this option will subtract the entered quantity from the Good Material and assign it as scrap for the selected code.
2. Assign Code to Machine-Reported Scrap: This option allows you to assign the selected scrap code to the entered scrap quantity from the unassigned machine-reported scrap. In other words, the entered scrap quantity will be subtracted from the unassigned scrap total, and added to the amount of scrap for the selected code. This will not change the Good Material value.
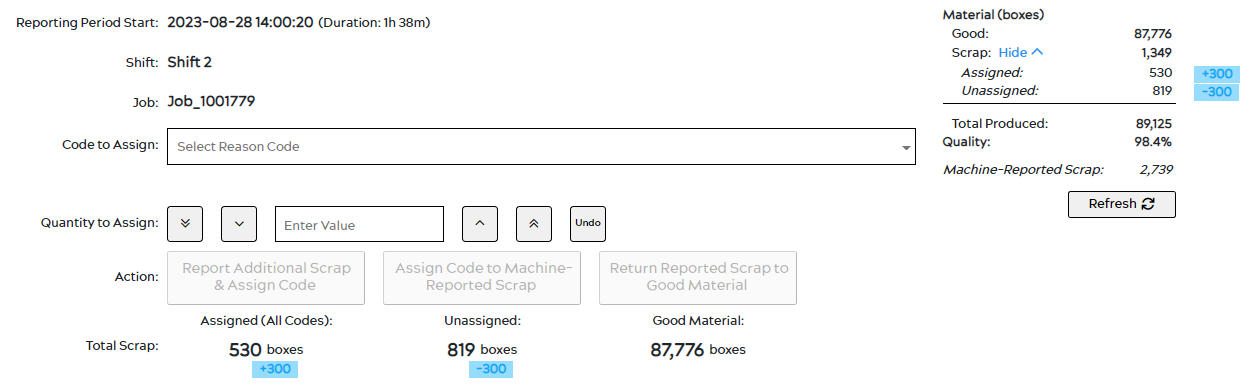
3. Return Reported Scrap to Good Material: This option allows you to take a quantity of scrap that has already been assigned a code (or is in the “Unassigned” code), and return it to the Good Material total. This option is only available if you select a code that already has a non-zero scrap quantity. The effect of this option is to decrease the scrap quantity in the selected code, and increase the Good Material by the same amount.
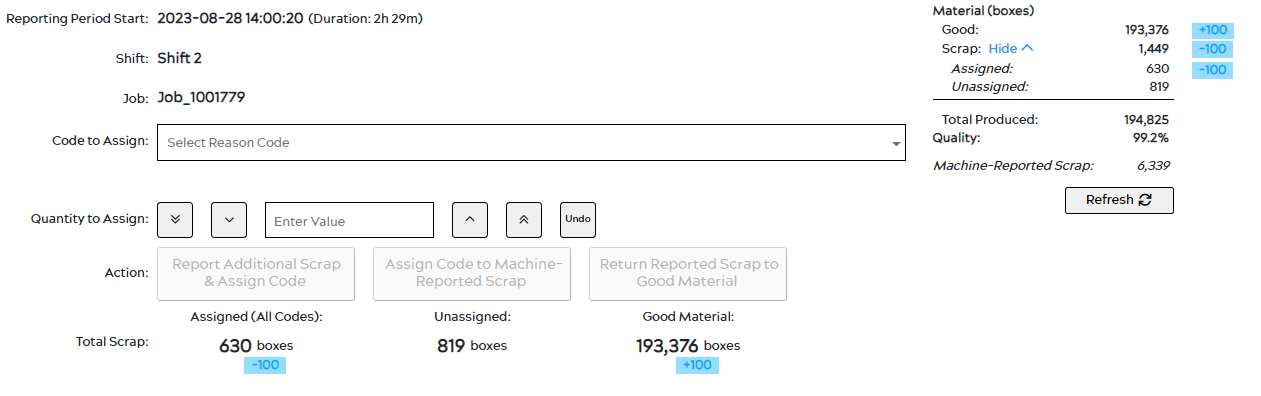
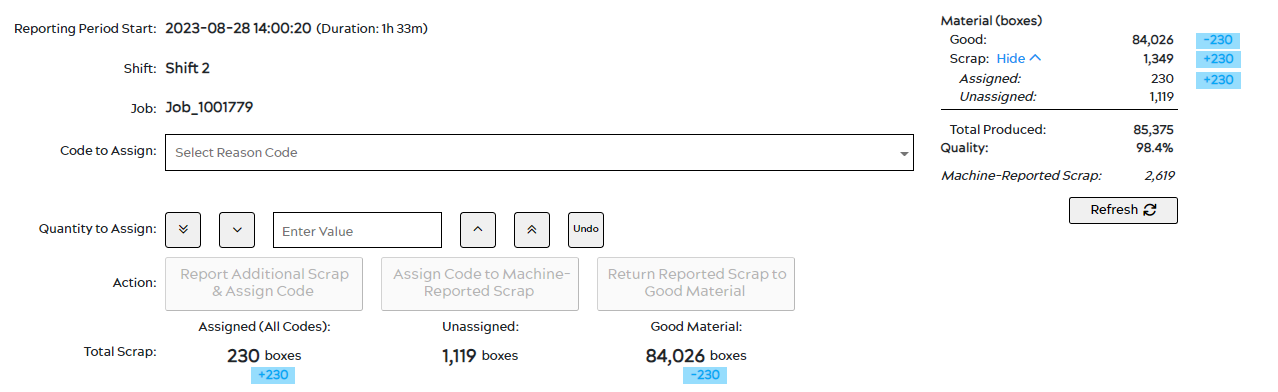
It is also important to notice how the new saved values change the Material (boxes) table on the right most of the page. When assigning scrap as additional scrap, the Quality percentage will decrease. However, when assigning the scrap code to Machine-Reported Scrap, the Quality percentage will not be affected as this scrap has already been accounted for.
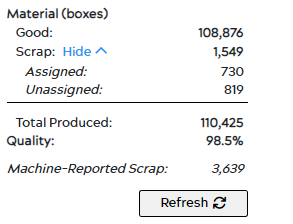
You can also refresh the page by clicking on the Refresh button to update the scrap values as well as material produced with the latest available data.
