Introduction
DOWNTIME categories can be used to group DOWNTIME codes (e.g. all codes related to electrical failures could be grouped under a category called “Electrical Failures”). These categories can then be used when creating reports to help you identify the largest and alerts.
In order to assign DOWNTIME codes to a machine, you must first create a list of codes to choose from. These created DOWNTIME codes can then be assigned to specific machines.
DOWNTIME Categories
DOWNTIME Categories are very general machine downtime terms. You can easily create and customize your own DOWNTIME categories from DOWNTIME > Admin > Categories.
Once you’ve created your desired downtime categories, you can start creating and managing your machine downtime codes and assign each to its specified category.

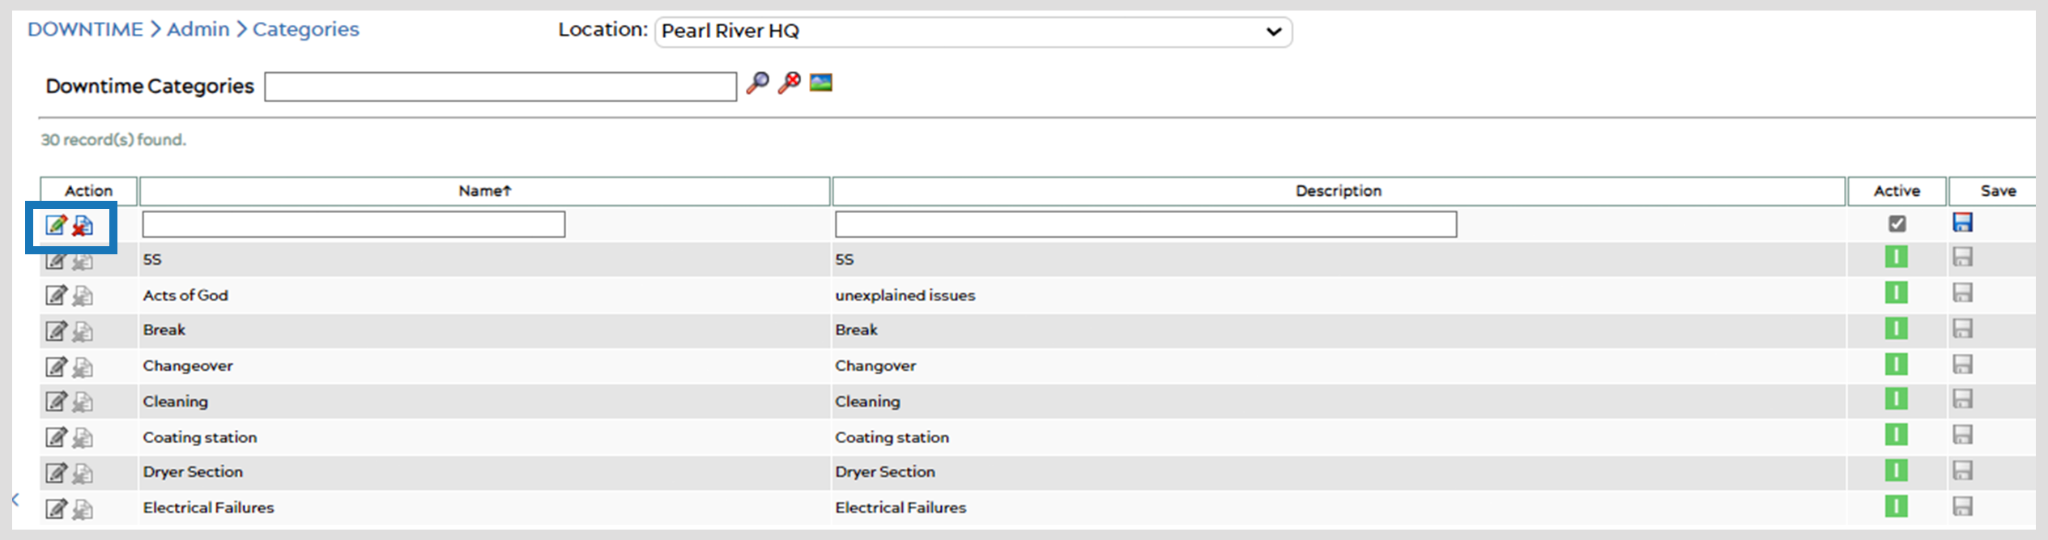
Select an item from the Location bar at the top of the page, if necessary, to view a specific location’s DOWNTIME categories.
Search for a particular category using the search bar at the top of the page. You can use the entire name, parts of the name, or other aspects of the category to find a list of suggested candidates. Use the asterisk, * , as a wildcard character to help find categories.
The search results will be displayed in a table. The column headings are as follows:
- Action: Click the pen-on-paper icon
 to edit a category, or the
  icon to delete a category. The
  icon next to “Action” allows you to add a new category.
 - Name: This is the name of the category. Note: Administrators should keep this name short, as it is used for plotting summary charts and reports.
- Description: This is the description of the category. It is not required but can be helpful when grouping codes.
- Active: This check box signifies whether or not the category is active and can be used for codes. Once a category is used, it cannot be deactivated. This is to maintain consistency over time. Green indicated the category is active.
- Save: Click this save icon
 to save the information you have edited.
To add a new category, click on the “New” icon ![]() next to the Action column. Type your desired Category Name and Description and click Save
next to the Action column. Type your desired Category Name and Description and click Save ![]() .
.
DOWNTIME Codes
Once you’ve created your desired DOWNTIME Categories, you can start creating and managing your machine DOWNTIME Codes and assign each to its specified category. To access the page from the top menu, go to DOWNTIME > Admin > Codes. If already in Categories, simply select Codes from the left side bar.
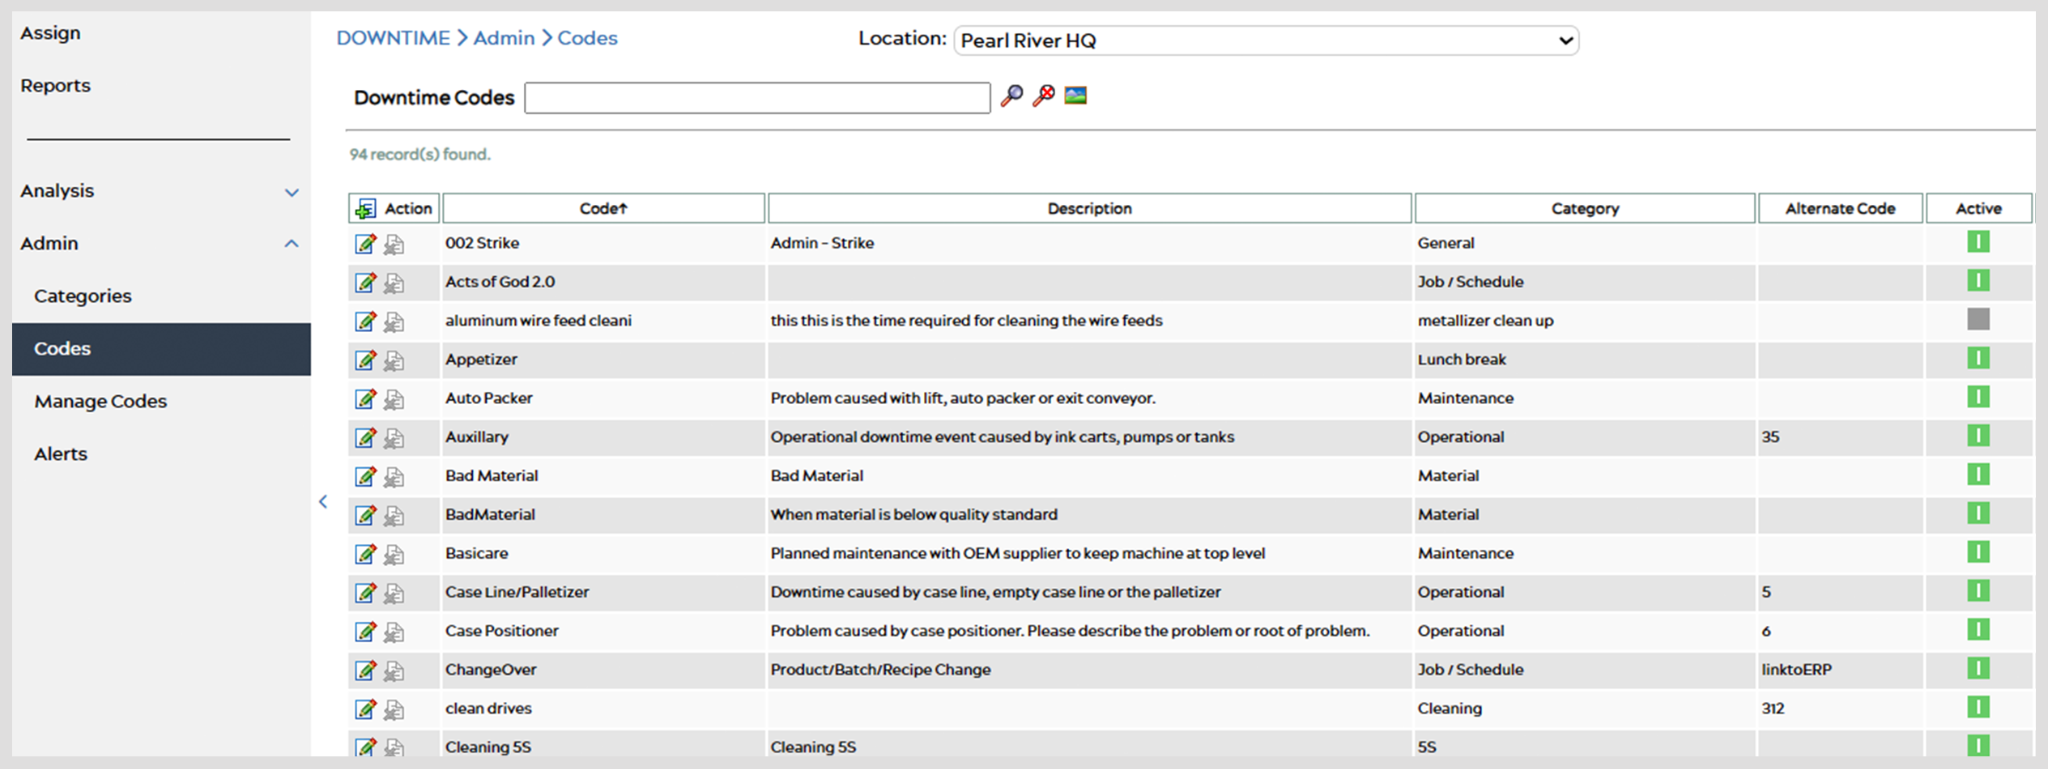
- Action: Use the
 icon to edit a code, or the
  icon to delete a code. The delete icon indicates whether or not the code is still used. Once a code is used, it cannot be deleted, and the icon will not be selectable. This is to maintain consistency over time. The
  icon next to “Action” allows you to add a new category.
 - Name: This is the name of the code. Note: Administrators should keep this name short, as it is used for plotting summary charts and reports.
- Description: This is a description of the code. It is not used for plotting so the description can be as long as desired.
- Category: Categories of what each code pertains to.
- Alternate Code: This input is reserved for future integration with external downtime tracking or production support systems.
- Active: This indicates whether or not the code is still used. Green indicates the code is active.
- Updated: This displays the date of the last update.
- Updated by: This displays who made the last update.
- Save: Click on the save icon
 in this column to save changes you have made to a code.
To add a new code, click on “New” icon ![]() next to the action Column. Write the Name of the code you want to create, a Description, and select the Category that you created and then click save
next to the action Column. Write the Name of the code you want to create, a Description, and select the Category that you created and then click save ![]() .
.
Managing DOWNTIME Codes
Once you have added a Code, you must now ensure it is enabled. From the Menu, select DOWNTIME > Admin > Manage Codes, which will bring you to a page resembling the image below.
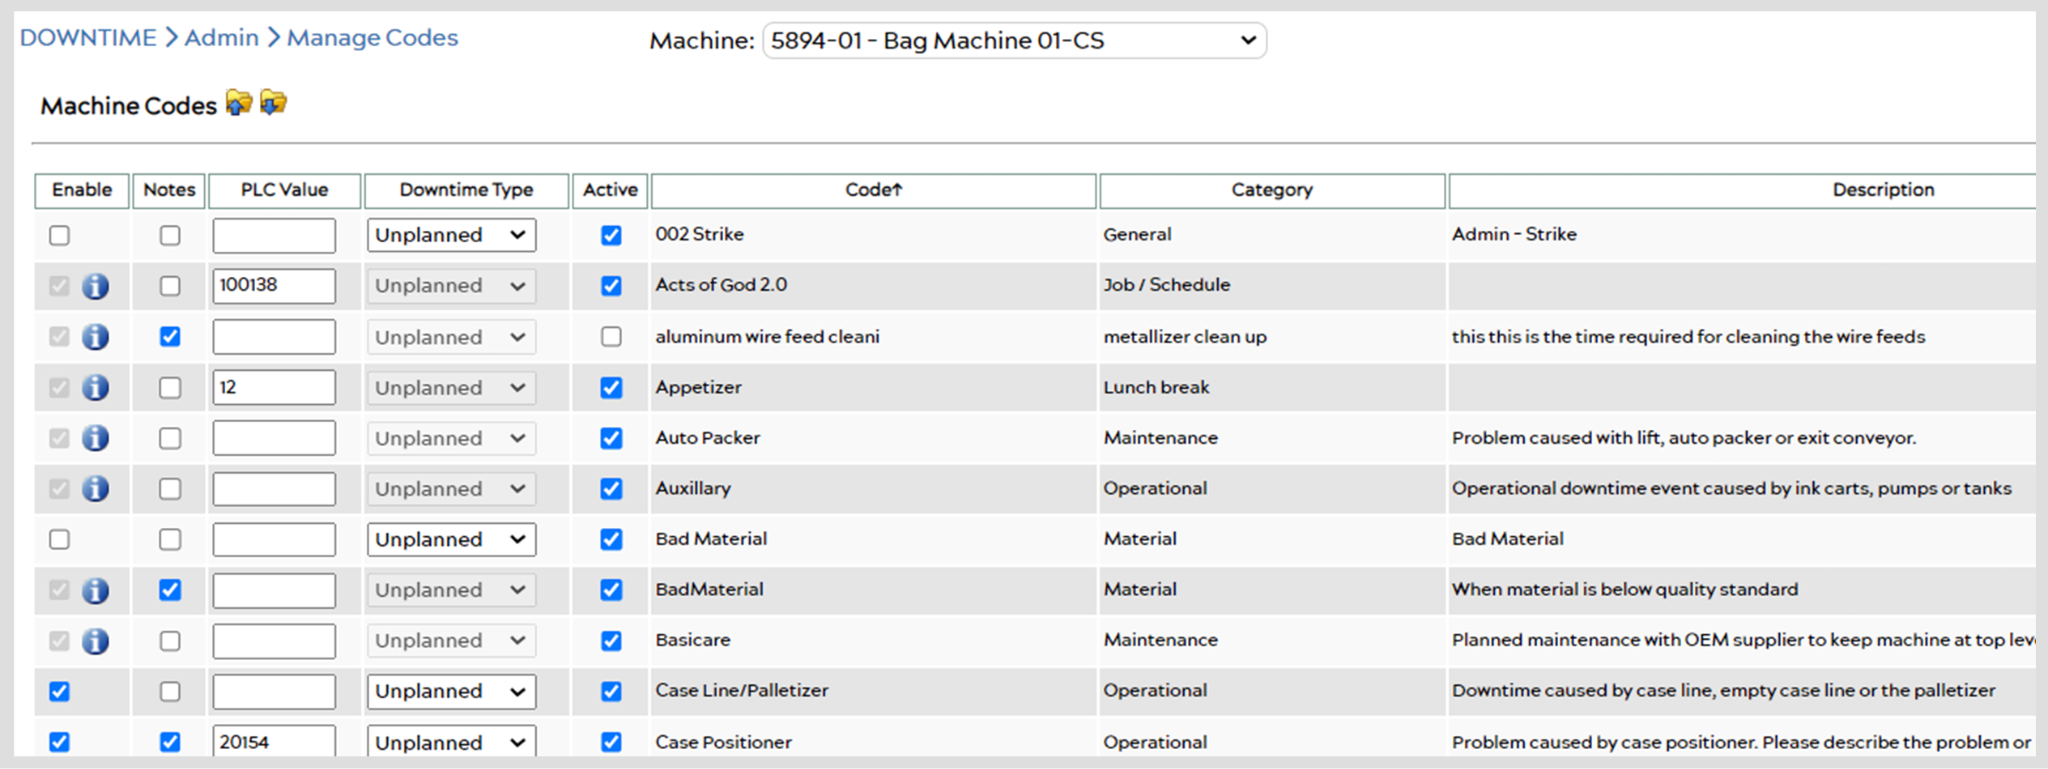
Use the Enable checkbox to enable the Code you just created, allowing it to appear on the Assign page.
If your machine has been set up with automatic downtime assignment, you can use the PLC Value box to enter the corresponding PLC codes to each respective downtime code in order to have them automatically assign.
Lastly, choose a Downtime Type from the selection column. You can read about each downtime type and how each one works here.
Once you’ve completed these steps for each desired downtime code, scroll to the bottom of the list and hit the Save icon ![]() to apply your changes.
to apply your changes.
For easy duplication of machine codes, use the import and export functions ![]() at the top of the page. Copy codes from one machine to another with only a few clicks.
at the top of the page. Copy codes from one machine to another with only a few clicks.
