Please note: This article describes Customer Portal users, which are different from Remote Service users. See this article for details on Remote Service users.
The Users page in the Customer Portal displays a list of each user account at your company. Each individual user can be assigned to specific machines, user groups, or admin access levels, all of which are explained in detail below.
To find a list of users, navigate to Admin Tools > Users in the Customer Portal.
By default, the Users page will load displaying an empty list.
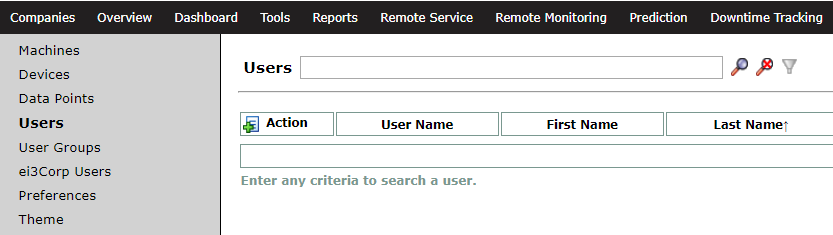
You can toggle the users list to display or hide disabled users. This can be done by clicking the filter symbol.

To read more about disabling users, see this article.
Search Functions
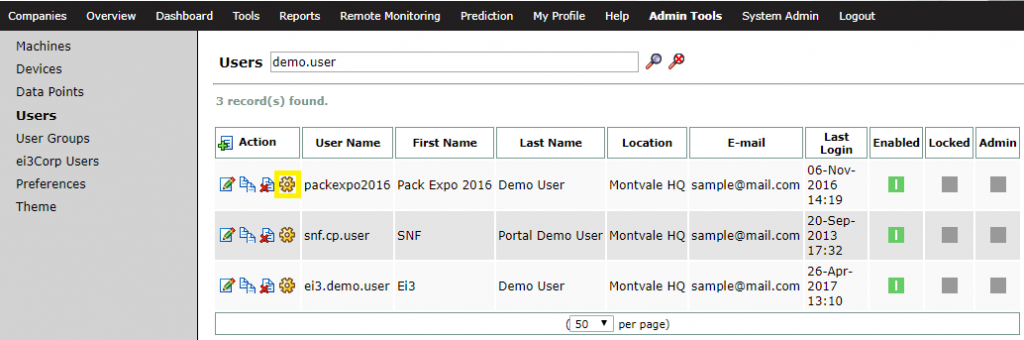
To find a user or list of users you want to find, enter search parameters in the search bar. You can search by User Name, First/Last Name, Location, Email, Enabled, Locked, or Admin.
To display a list of all users enter the * character search term.

Searching with the term Admin displays a list of Admin users (signified by the green icon in the Admin column).
New User Creation
To create a new user:
1. Log into the Customer Portal.
2. Go to Admin Tools > Users, and select the ![]() icon to open the New User creation page.
icon to open the New User creation page.
3. Complete the New User form
Here, you can input a username, password, and set other parameters, such as allowing password changes or requiring one at the next login.
Note: When an Admin creating a user has an admin level higher than local, they will need to select the admin level of the new user as well in this step.
At a minimum, make sure you fill out the user name, initial password, and an email address, and select the appropriate Admin Access Level.
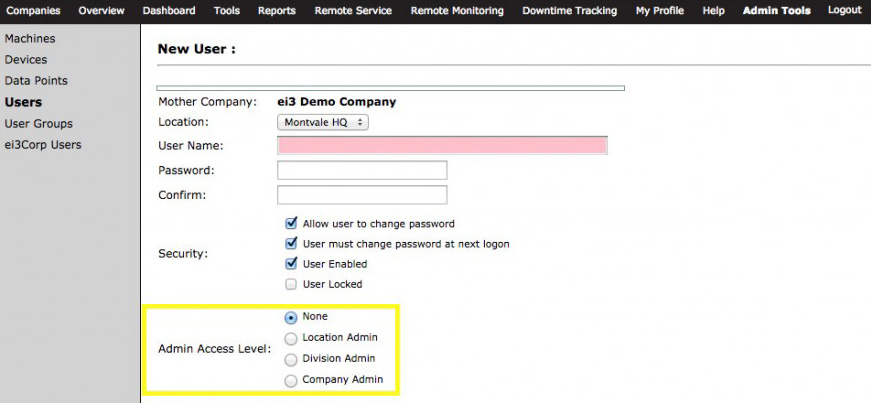
Admin Access Levels
The Admin Access Level defines the level of view that the user will have within the customer’s mother company.
- None – No special access; all permissions must be granted explicitly. Regular users have no visibility to the Admin Tools menu unless specifically granted Administrator-level access to a product from the User Permissions.
- Location Admin – User has implicit permissions to all products and machines in their location. Location Admins can create and update any user within their Location.
- Division Admin – User has implicit permissions to all products and machines in their division. Division Admins can create and update any user within their Division.
- Company Admin – User has implicit permissions to all products and machines in their company. Company Admins can create and update any user within their Company.
Set User Permissions
Select the ![]() icon to set the user’s individual machine view permissions.
icon to set the user’s individual machine view permissions.
Note: an Admin will have full access to all machines within their view, so this step is only not needed for the Admins.
Permission Levels
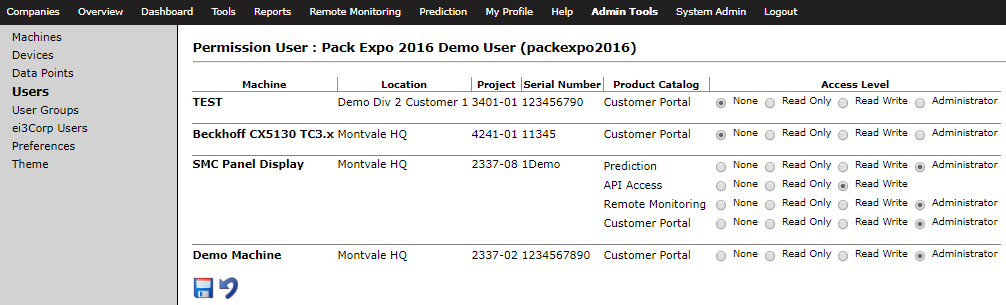
The Permission Level defines the ability of the user to seen and interact with a machine on the Customer Portal. Permissions are assigned individually for every module on every machine. Permissions are granted upon login. Therefore, users must log out and log back in to see any changes to permissions made by administrators.
There are four types of Permission Levels:
- None – User has no permission whatsoever to the product on the machine.
- Read Only – User has read only permission to the product on the machine.
- Read Write – User has read / write permission to the product on the machine. One example use case is for users that will assign downtime tracking codes in the Downtime Tracking, whereas a user with Read Only could view but not modify downtime assignments.
- Administrator – User has Administrator permission to the product on the machine (for example, has the ability to configure alerts).
For a full list of user permission levels and capabilities, see here.
Editing User Information
Clicking the ![]() icon next to a user will allow for edits to be made to an existing user’s information. Change a user name, email, admin access level, or user group from this page. Certain security permissions are available here, including allowing or requiring the user to change their password, enabling or disabling a user, and more.
icon next to a user will allow for edits to be made to an existing user’s information. Change a user name, email, admin access level, or user group from this page. Certain security permissions are available here, including allowing or requiring the user to change their password, enabling or disabling a user, and more.
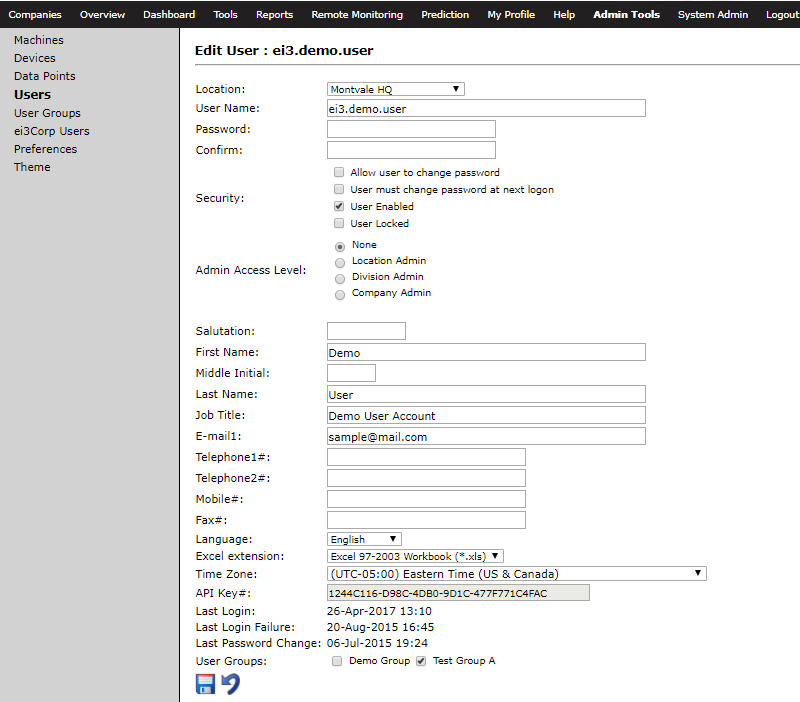
See also: My Profile
User Groups
When applied properly, the user groups feature allows for the easy application of user settings for multiple users. Rather than clicking through multiple times to create the same set of custom permissions for each new user, it is possible to create a single user group, assign these specific permissions to the group, then selecting the appropriate user group checkbox to apply those user group settings to that user.
New User Group Creation
To create a new user group:
1. Log into the Customer Portal.
2. Go to Admin Tools > User Groups, and select the ![]() icon.
icon.

3. Complete the New Group form.
In this form, enter the name of the group and select the user profiles to include in this group. Users in the group will have the same access permissions to machines in the system. Groups are usually used for a number of Operators or Admins that need to interact with the same set of machines and perform similar tasks on various machines.
4. Set Group Permissions
Select the ![]() icon to set the user group’s machine view permissions (see Permission Levels).
icon to set the user group’s machine view permissions (see Permission Levels).
My Profile
The User Information tab from the My Profile menu allows the user to set their own time zone, language, as well as to change or add additional personal information such as email address or language.
It is also important to note that user permissions set in the Customer Portal have nothing to do with the user permissions set in the Remote Service Platform. The users in the Remote Service Platform are those of the OEM. The users in the Customer Platform are those of the OEMs’ customers and are entirely separate from one another. Read more about Remote Service Platform users in this article.
