This article explains how to set up and run XML, JSON, Rockwell and eWOD-based Amphion Edge Device data collection in detail. For a general overview of data collection, see this article. For OPC-UA-based data collection, see this article instead.
Setting The Device Manufacturer – Category
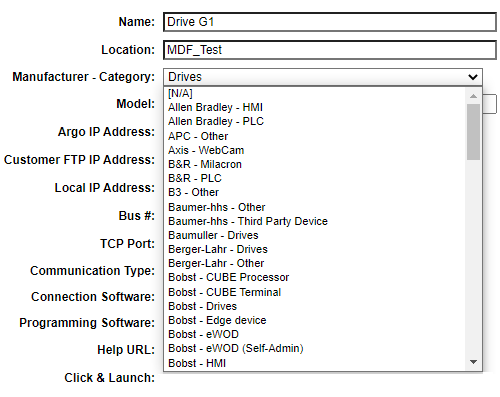
The device which the data points will be read from must be set with one of the following values in the Manufacturer – Category dropdown on the Edit Devices page in the Customer Portal > Tools > Admin > Devices:
- Rockwell – PLC (MicroLogix,slc505,plc5e) (Amphion)
- Rockwell – PLC (ControlLogix,CompactLogix,FlexLogix) (Amphion)
- Generic – JSON (Amphion)
- Generic – XML (Amphion)
Adding Data Points
To set up data through these protocols, all data points must be entered into the Data Points page (found under Admin Tools).
NOTE: When setting up a machine to use Amphion data collection, all of the devices from which data will be collected must use one or more of the allowed device types. These device types, listed below, are specifically defined in ei3 for enabling Amphion data collection using the listed Rockwell or eWOD protocols. The devices selected when setting up data points must be defined using these device types. To set up or change the device type of your device, see this article.
If any data points are set up with a device that is not used with Amphion data collection, then Amphion data collection will not be enabled and you may contact ei3 to set up data collection for you using the ei3 private cloud.
You can find a full list of devices compatible with each data collection type in this linked article.
You can add or edit existing devices on your machine from the Edit Device page in the Remote Service Platform (under Admin > Machines > Devices > then Edit icon ![]() next to that device, or clicking the New icon
next to that device, or clicking the New icon ![]() to create a new device.
to create a new device.
To create new data points, click the ![]() icon to open the new data point creation page.
icon to open the new data point creation page.
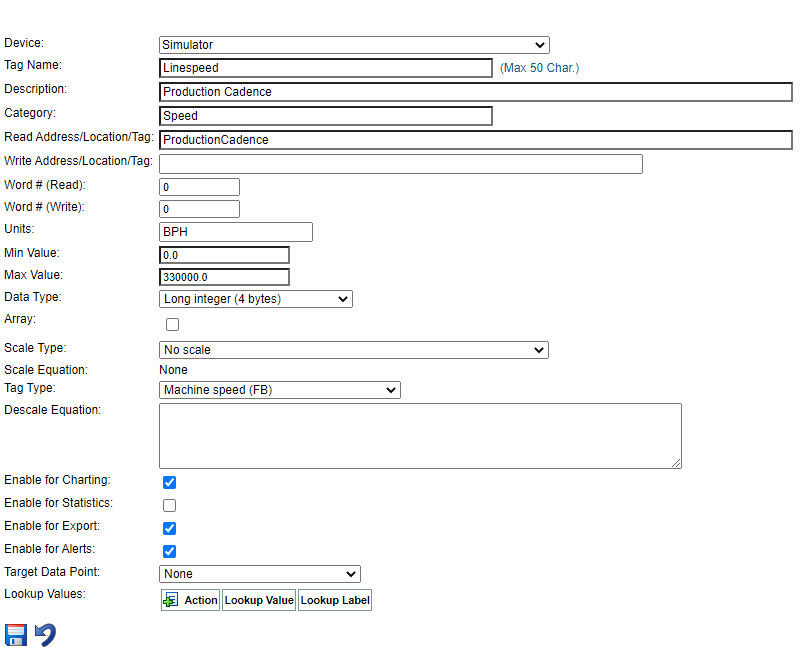
The data point creation page has many fields which are required to be filled in with the proper information. Each field is described below.
- Device: Choose the device for this point to be created on.
- Tag Name: Name of data point. Example include: BadProductCount, DowntimeCode, Machine_Speed, MotorTemp_AxisA1, etc.
Note: The tag name may not contain spaces or special characters. - Description: Relevant description of the data point, this may include spaces.
- Category: Each datapoint belongs to a category. Examples include: Prediction, Material, etc. (May vary according to machine and company).
- Read Address/Location/Tag: This field uses many important variables, including NamespaceIndex, IdentifierType, and Identifier. In our example above, the Read Address was ProductionCadence. The format and structure of this read address is subject to change based on the collection method you’re using.
- Word # (Read)/Word # (Write): In most cases, this value is zero.
- Units: Enter the units of data values, if applicable.
- Min/Max Value: Data point min & max, if applicable. Used for displays and charts across ei3.
- Data Type: Choose data type (Boolean, short, long, etc).
- Array: Check if appropriate.
- Scale Type & (De)Scale Equation: Allows choosing of data scale type if needed. Enter scale equation in the text box(es) provided.
- Enable for Charting/Statistics/Export/Alerts: Allows target data point to be enabled/disabled for any of the provided options, using checkbox.
- Target Data Point: Select a data point target (if necessary).
Once the data point has been configured and all necessary fields have been correctly entered, hit the Save icon ![]() at the bottom of the page.
at the bottom of the page.
After all the data points have been entered, and the machine has been configured, data collection can be started.
Starting Data Collection
In the Customer Portal, under Admin Tools > Machines, click the button under the Collection column to initiate data collection.

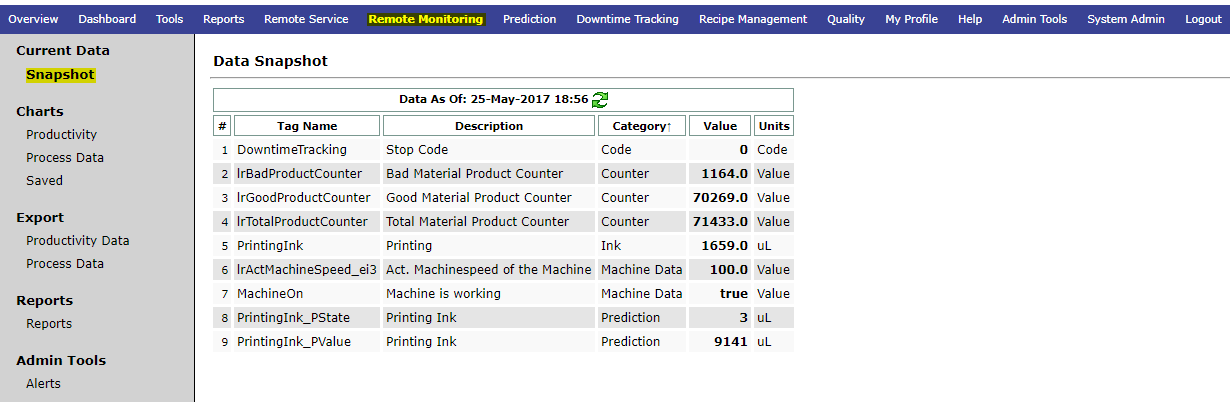
To confirm data is collecting, wait ~5 minutes then check the Remote Monitoring Snapshot in ei3. Your data should display with a time stamp within the last minute.