Navigating the Page
Navigate to the Assign page from the top menu bar through DOWNTIME > Assign, and you will be brought to a page resembling the one below.
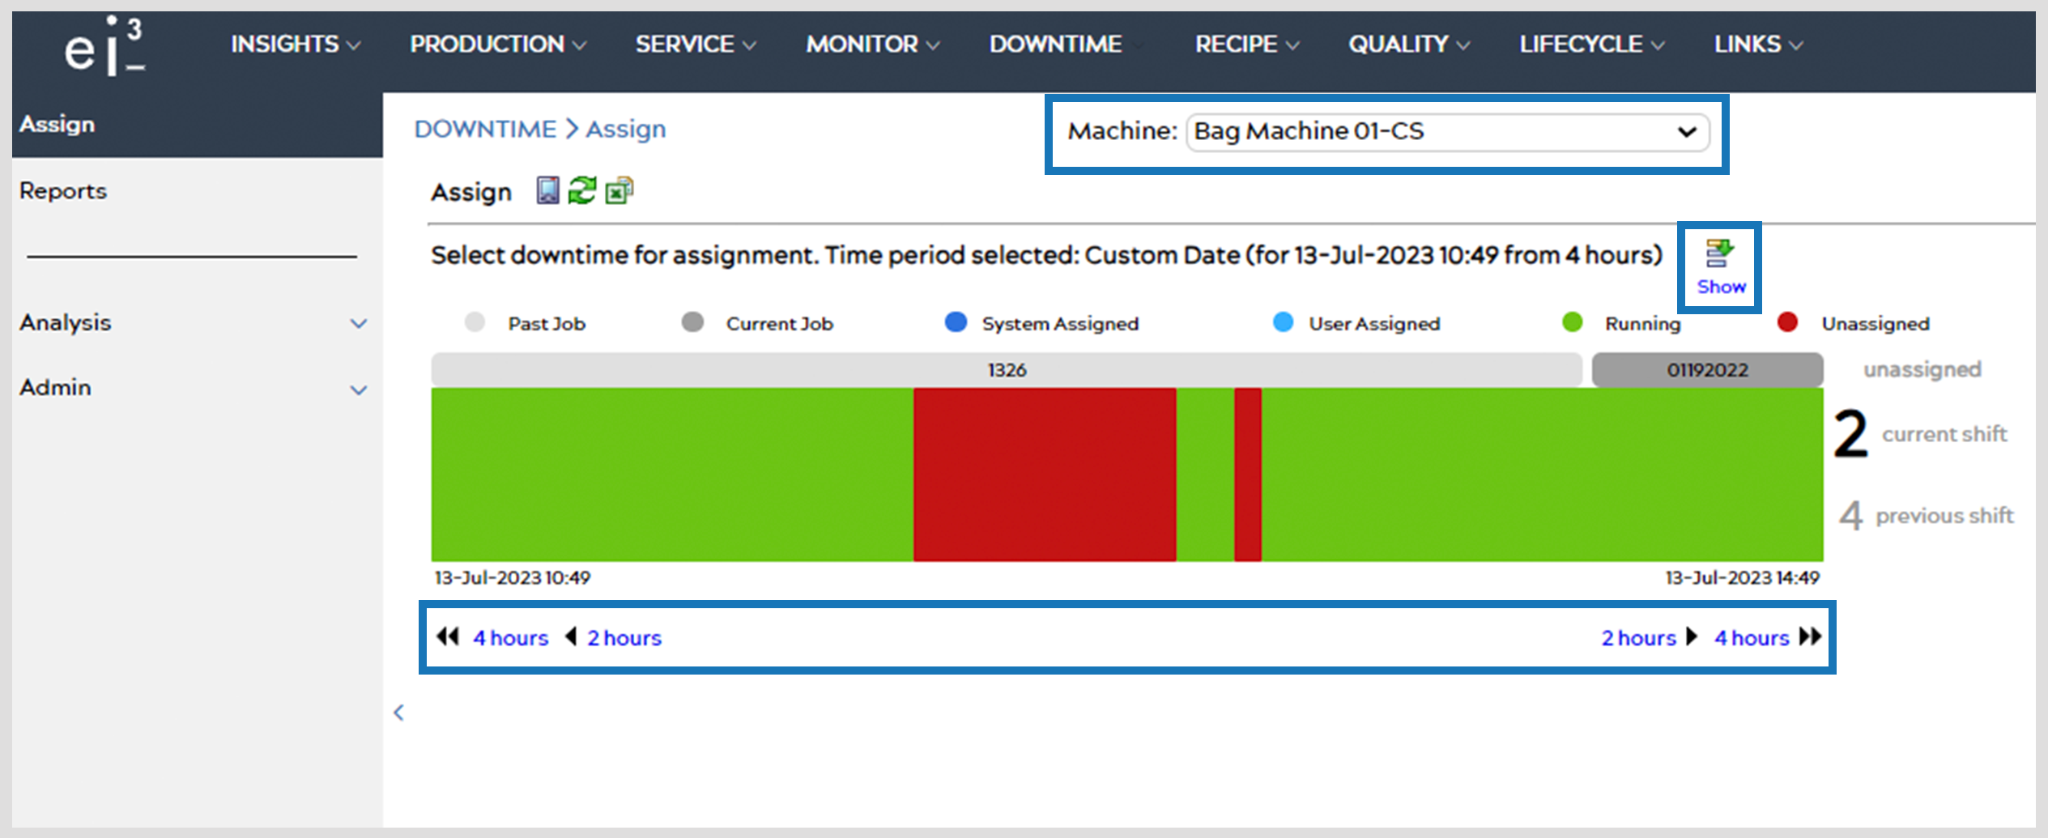
You can select the machine you would like to view using the bar at the top.
Selecting the Show icon ![]() will expand that section so that you can choose the time period you would like to view. You can either select one of the preset options or create a custom date and duration.
will expand that section so that you can choose the time period you would like to view. You can either select one of the preset options or create a custom date and duration.
You can also use the arrow buttons under the Downtime bar to scroll through the timeline in increments of 4 hours or 2 hours.

On the Downtime bar, green means that the machine is Running during that time period. Red indicates that the machine is down, but it is an Unassigned Downtime. This means that the downtime has not been assigned, and we do not know why the machine was down for that certain period of time.
Assigning Downtime
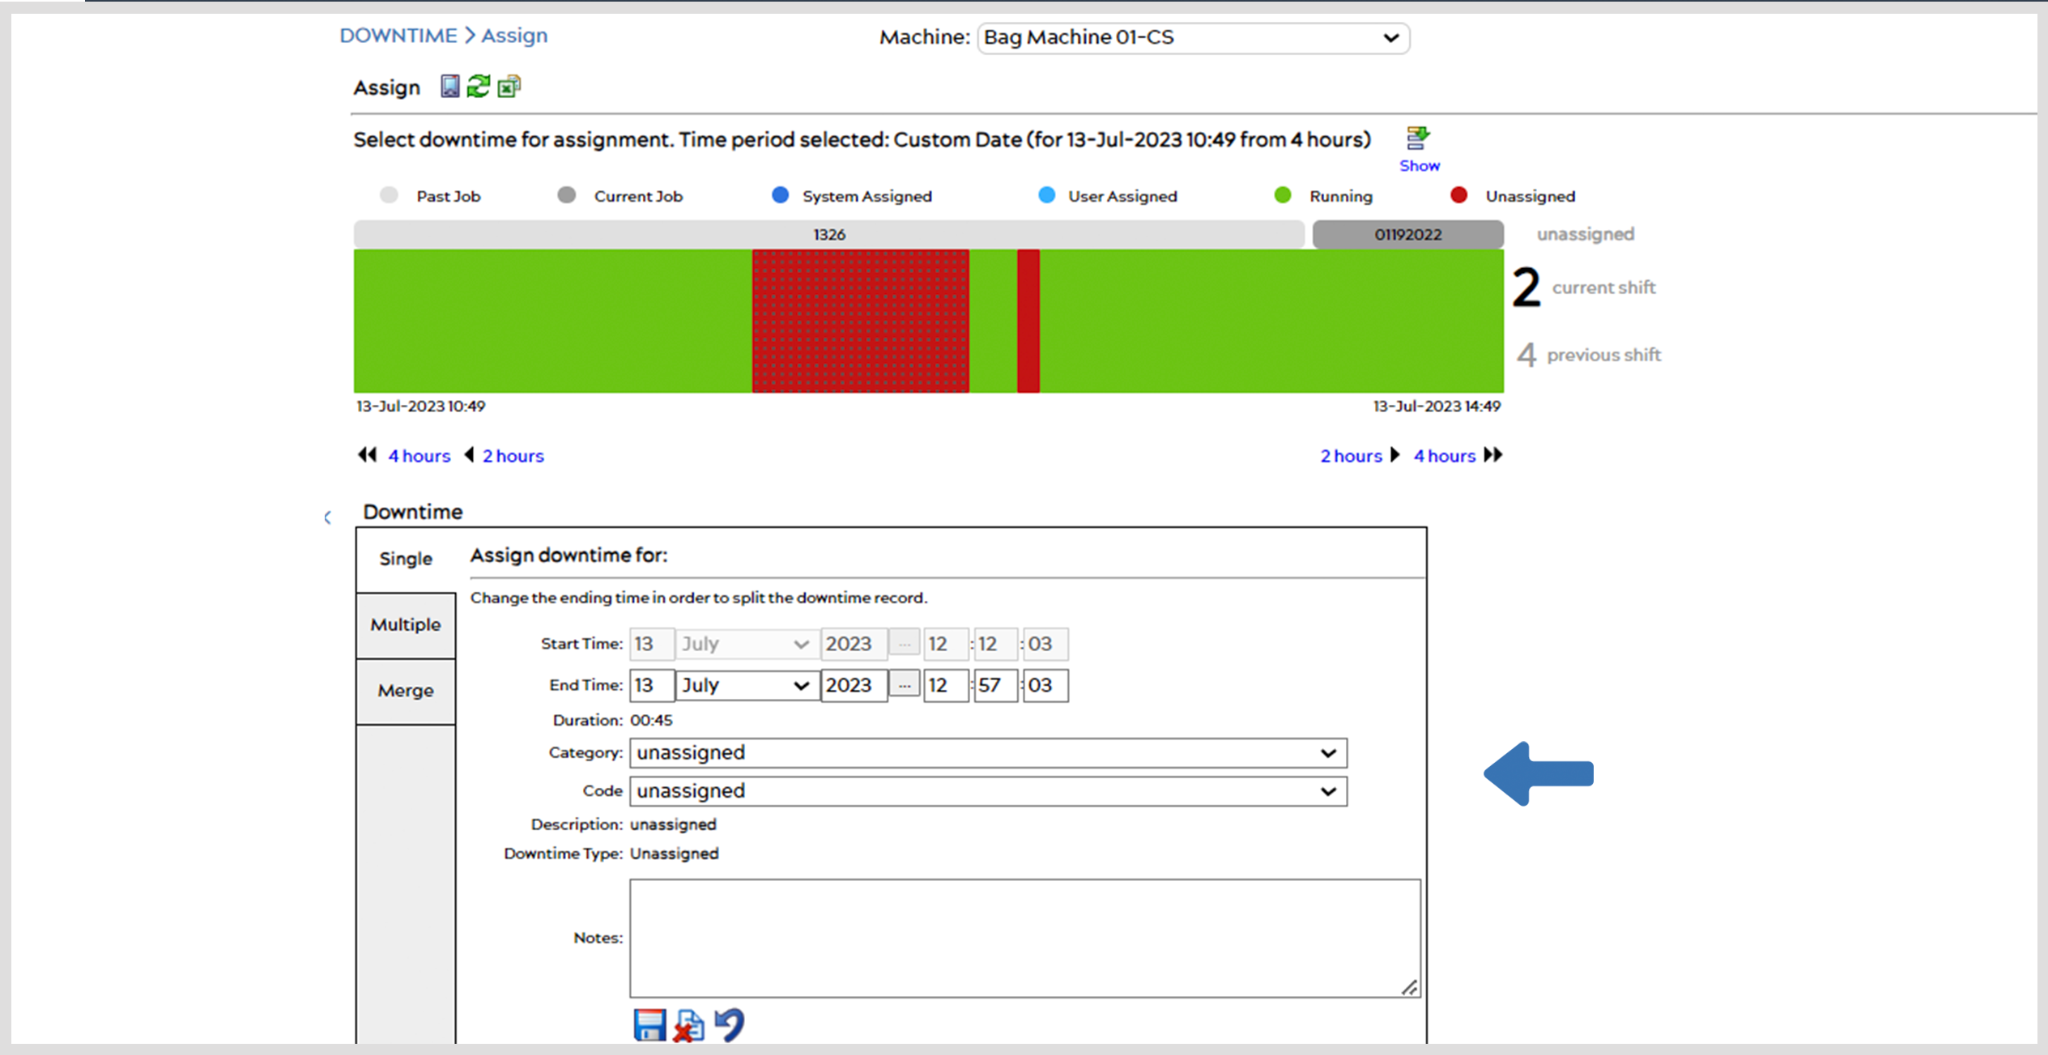
If you would like to assign downtime to a red unassigned segment and give it a “reason”, select that downtime segment on the bar, prompting an entry panel like the image below to appear below the Downtime bar, where you can assign downtime.
The 3 Ways to Manually Assign Downtime
In this entry panel, Categories and Codes can be assigned to the downtime period, as well as options for additional adjustments to downtime periods, which can be made using the following three modes:
1. Single – This function is used when a user wants to assign a downtime code to one single event on the displayed date/time range. A machine operator would use the single assignment mode to assign a job setup code soon after starting a new production run, for example.
2. Multiple – Multiple Assignments is used when a user has multiple downtime events that require the same downtime code. Instead of filling out the assignment form for each event, an operator is able to fill out only one form for all events.
Note: Multiple assignments can only be used to assign codes to unassigned downtime events (shown in red).
After clicking on Single or Multiple below the graphic, click on the segments of time you would like to edit. You are then allowed to edit the following:
- Category: You can select a code category from the drop down list. This category will affect what codes appear in the code drop down.
- Code: Choose a code from the drop down list. The contents of this list are affected by the category you chose earlier.
- Notes: Here you may enter notes on the time period. Some codes may require you to write notes.
3. Merge – Merge Multiple Assignments is used when multiple downtime events separated by some period of machine runtime are related.
Note: When using this function, the start and end events must be unassigned downtime events (shown in red).
After editing or adding information click the save icon ![]() . Clicking back
. Clicking back ![]() WILL NOT save changes.
WILL NOT save changes.
As soon as you have assigned the downtime and saved it, you will see that the downtime color has changed to a light blue color meaning that it is a manual, User Assigned Downtime.
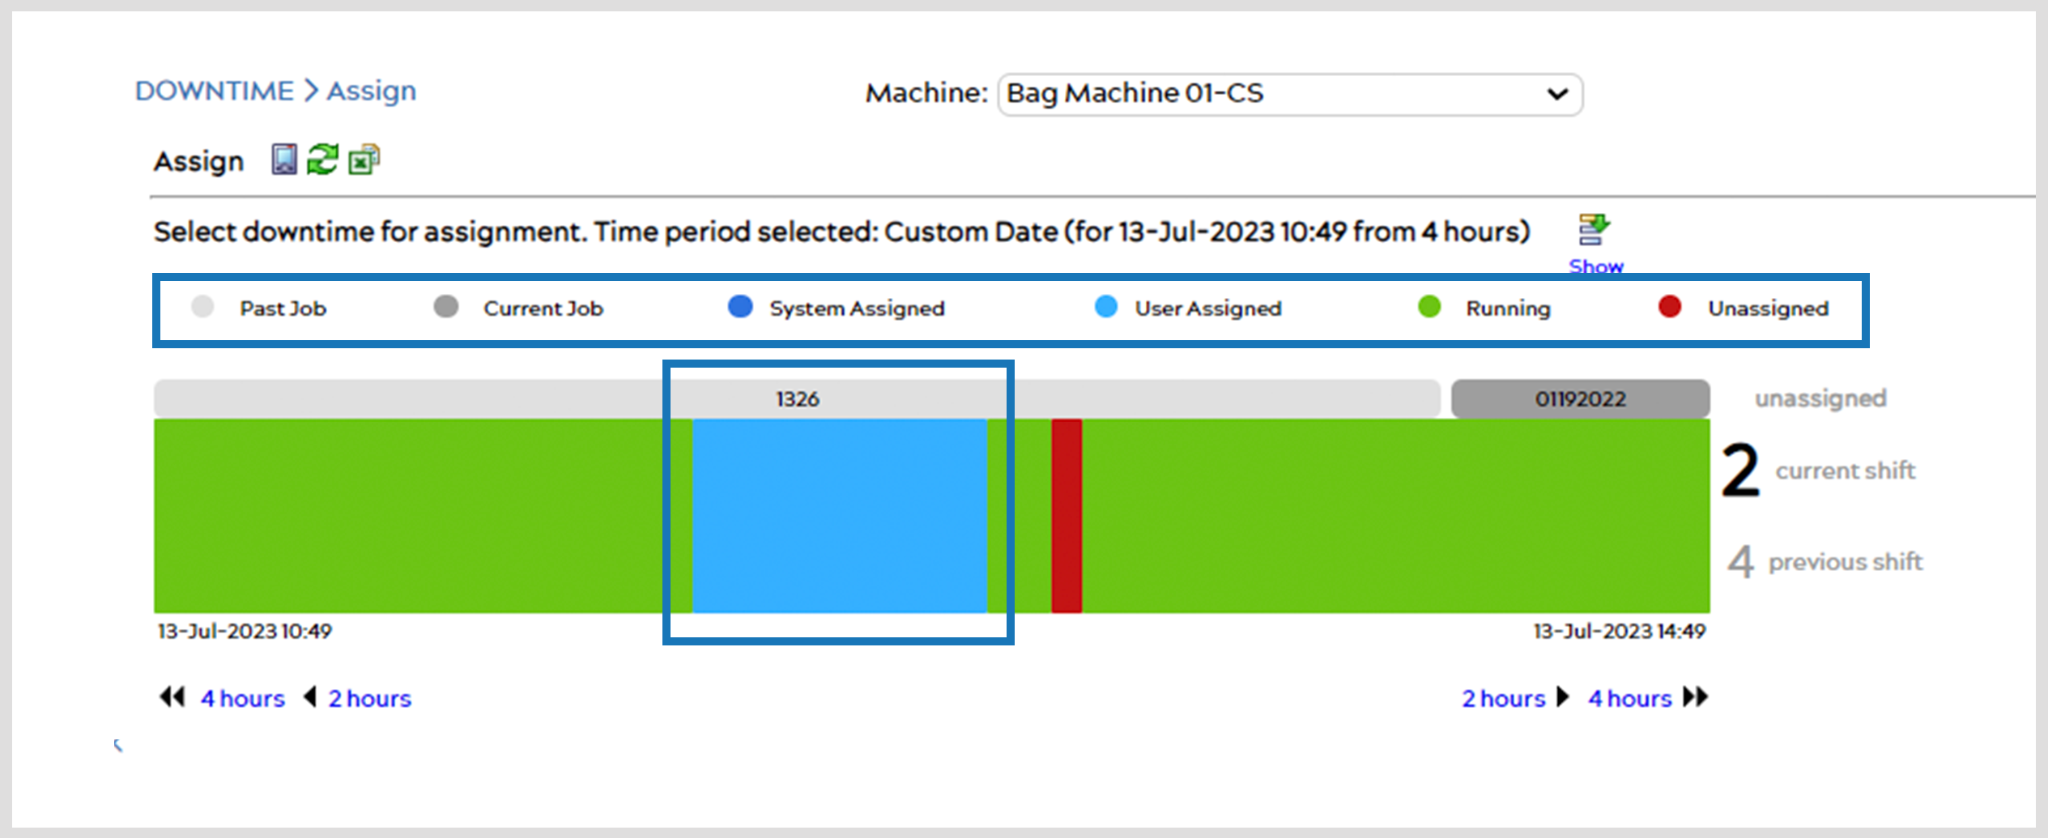
A darker blue segment indicates an automatic, System Assigned Downtime meaning that the downtime category and code were automatically assigned by the system. Read more about this in the Automatic Downtime Assignment section
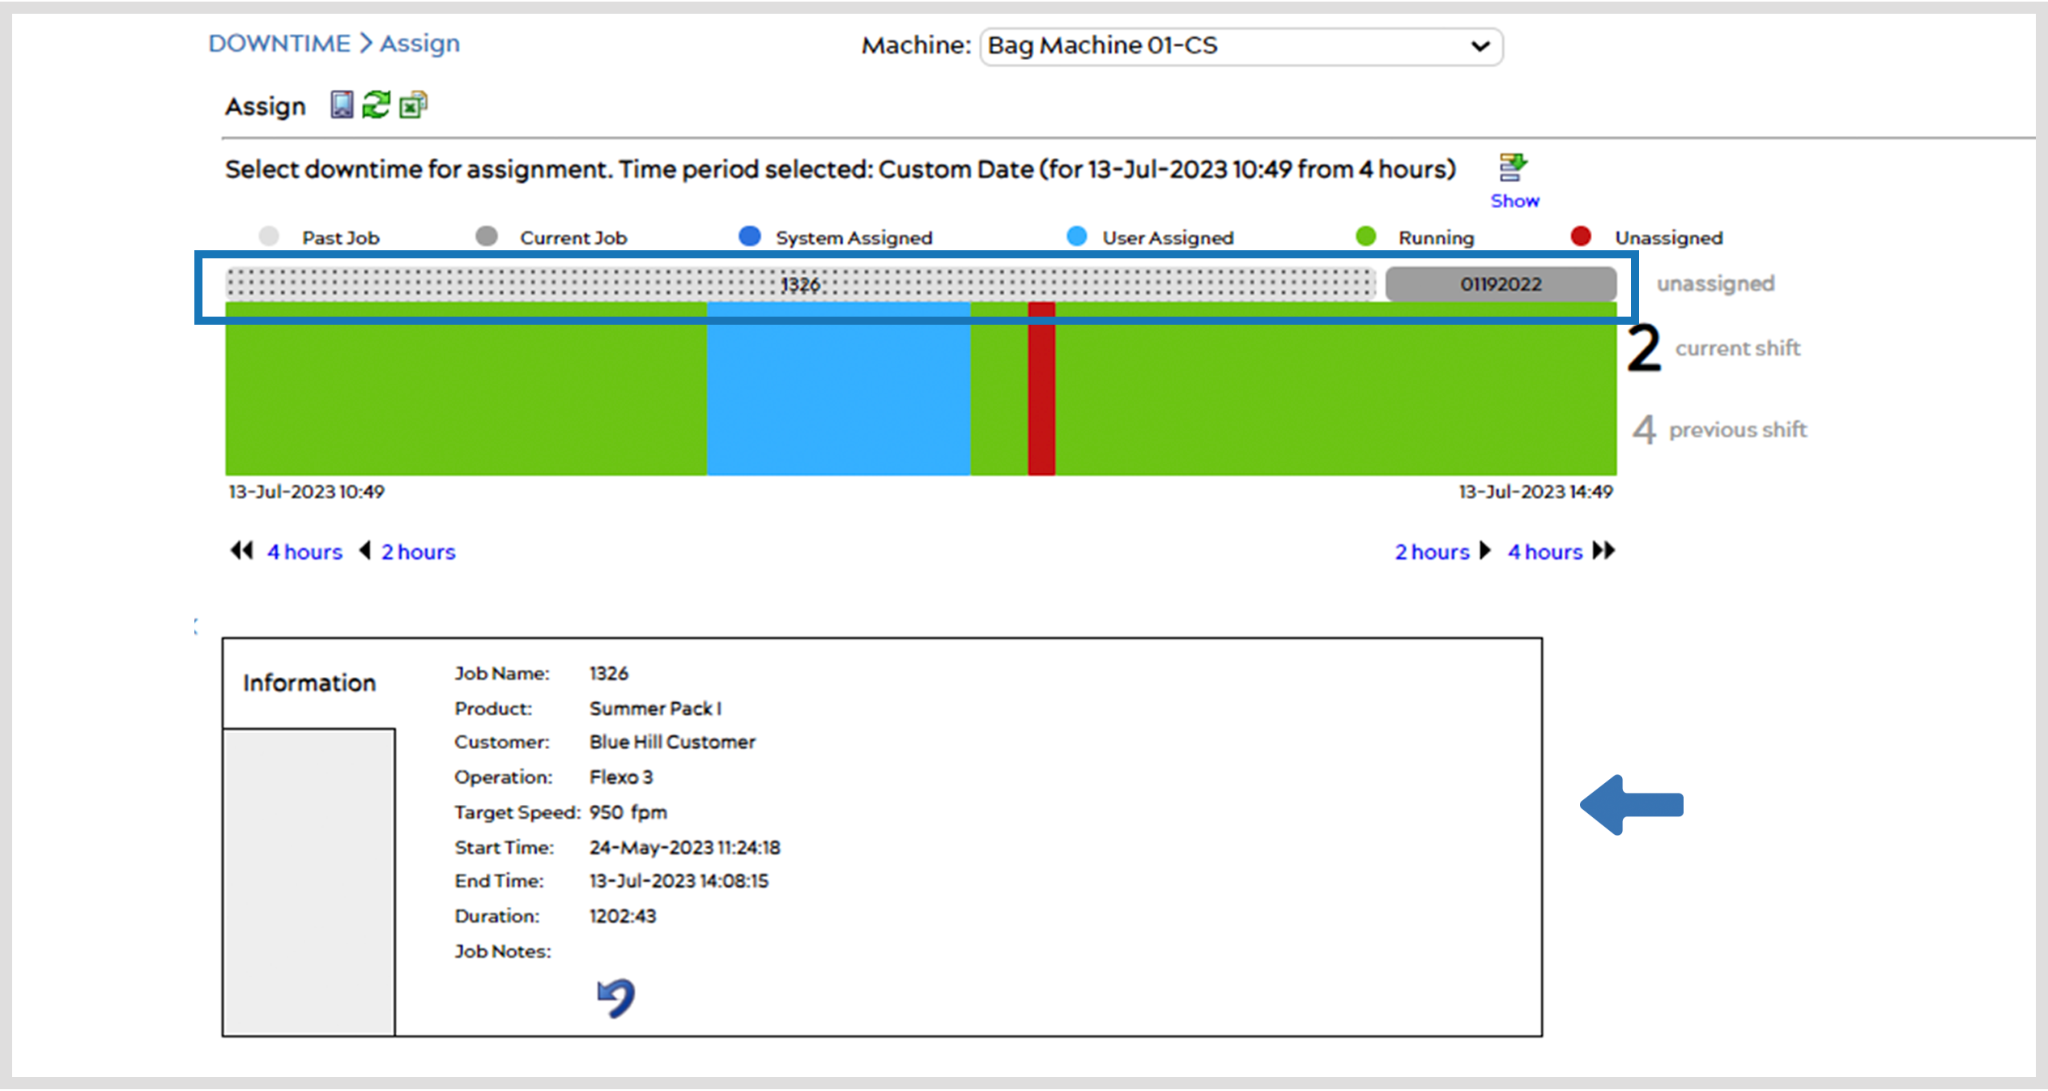
Selecting a gray Job bar above the Downtime bar for either a Past Job or the Current Job will prompt an entry panel to appear below containing all of that Job’s Information.
Automatic Downtime Assignment
Using PLC Values, it’s possible to have downtime codes automatically assigned rather than having to rely on manual input. PLC Values must be entered onto the PLC itself, and then the correct value must be assigned to the proper code (from the Manage Codes page).
It’s also possible to have downtime codes automatically enter a downtime note as well, using the tag type called Downtime note.
Any code that is assigned automatically will show as being assigned by the System Account user to indicate that it was automatically assigned. Other users can still manually assign downtimes or edit previous downtime assignments – doing so will show their name in the Assigned By column. This is done for record-keeping purposes and tracking user input (will show up on downtime tracking exports and Pareto charts).
If you have questions about automatic downtime assignment, contact us for details.
