This function only works with specific Amphion Edge Device data collection for certain machines. If you do not meet these requirements, please contact us for assistance with restarting data collection on a machine.
Adding and Editing Points
To add or edit data points, go to Admin Tools > Data Points (in Remote Service or the Customer Portal).
By default, the page will at first show only a search bar. Use the * symbol (wild card) and click Search (Enter key or ![]() icon) to display a list of all data points for the machine.
icon) to display a list of all data points for the machine.
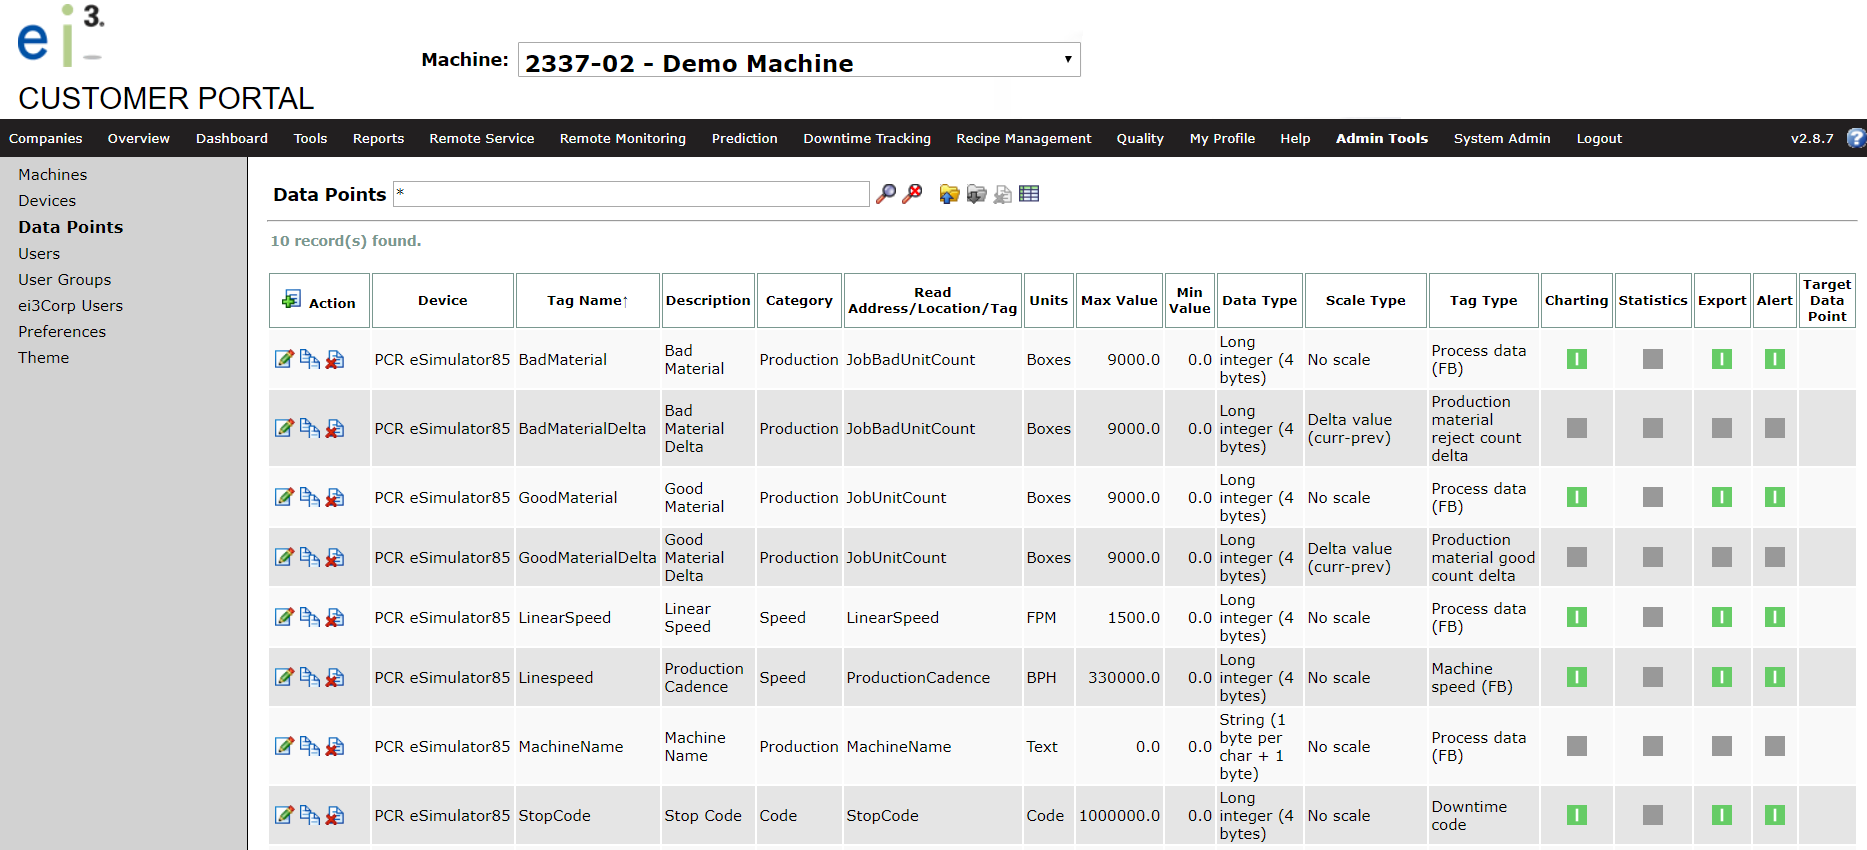
In the Action column, you can make adjustments to the data points as needed. Each function is detailed below.
![]() – Create a new point. Opens the New Data Point page, details are shown in this article.
– Create a new point. Opens the New Data Point page, details are shown in this article.
![]() – Edit the selected data point
– Edit the selected data point
![]() – Copy the selected data point. An Edit Data Point page will appear (details shown in this article), and clicking the Save icon
– Copy the selected data point. An Edit Data Point page will appear (details shown in this article), and clicking the Save icon ![]() will save it as a new point.
will save it as a new point.
![]() – Delete the selected point. Caution: Deleting a point removes the entire history of that data point. Contact us for assistance with this function.
– Delete the selected point. Caution: Deleting a point removes the entire history of that data point. Contact us for assistance with this function.
Added or changed points will display in the list with a ![]() symbol to indicate that they are new or changed since data collection was last started, and those changes have not been implemented yet.
symbol to indicate that they are new or changed since data collection was last started, and those changes have not been implemented yet.
Restarting Data Collection
From the Customer Portal, go to Admin Tools > Machines.

new or changed data points will not yet be implemented until data collection is restarted. On this page, the ![]() symbol is used to indicate that the points listed on the Data Points page are not in sync with the data points currently being collected.
symbol is used to indicate that the points listed on the Data Points page are not in sync with the data points currently being collected.
Stop the data collection job by clicking the ![]() icon. Then when the icon changed to
icon. Then when the icon changed to ![]() click the icon again to restart the data collection.
click the icon again to restart the data collection.
If successful, the changes will be implemented to the data collected from that point forwards.
If the PLC is offline, the changes will be implemented when the device is back online.

